
With Bubble (https://bubble.io) you can build and host a web application without writing any code! A common requirement, for even a simple business app, is the ability to generate a document, but there is no native Bubble PDF generator.
This article explains how to connect a Bubble application to the Docmosis Cloud document generation API using a Bubble API Connector.
We focus on sending single items of data, and our second article goes further to cover sending repeating data items.
Overview
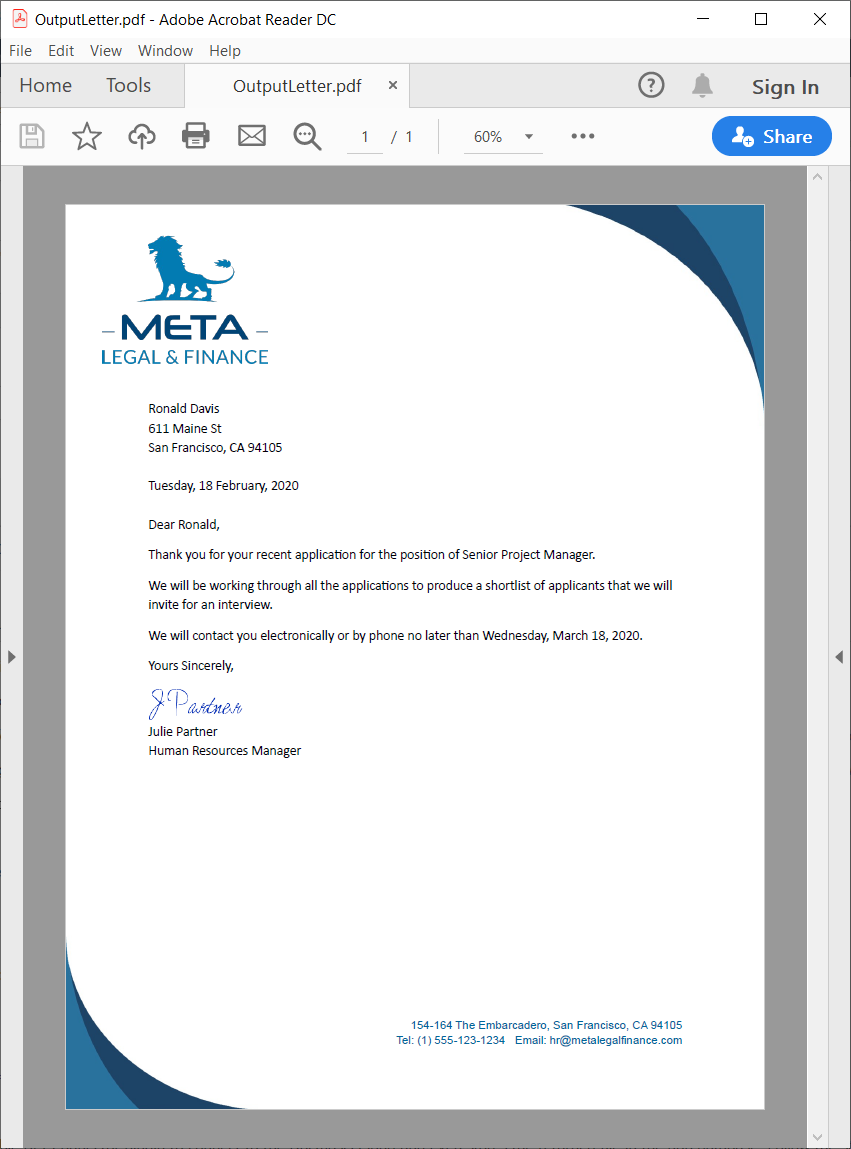
In this example we create a simple webform, using Bubble, to collect data and initiate the document generation. We will use the Docmosis Cloud service to generate a PDF letter. The letter will be based on a Microsoft Word template stored in your Docmosis Cloud account.
When the form is submitted the data from the form will be sent to Docmosis and merged with the template to create the PDF.
The generated PDF letter will be saved in the Bubble application database and also downloaded.
You can try out the demo Bubble app and download the generated PDF, here:

If you are already familiar with Bubble you can view a read-only version of the back-end of our application.
This example could be extended to generate complex documents in PDF/Docx/ODT/TXT formats. You could also use any data stored in your Bubble application and use any action to trigger the generation of the document.
You will need
Bubble Account
Obviously, there is a lot to learn about Bubble. Follow their interactive lessons to get you started.
You can either create a new Bubble app by following the steps below or start work with an existing one.
If you are exploring our sample app, start with the Workflow to see the Steps, and in the Plugins > Api Connector > Docmosis you can see the GenerateLetter call details. The generated documents will be stored in the Data > App data > All DocmosisFiles
Docmosis Cloud Account
If you don't already have a Docmosis Cloud account, you can start a free trial here.
Once you have an account you should login to the Docmosis Cloud Console.
Note: In this example we are using the US region for storing templates and generating the document, but you should use your preferred region.
Let's Get Started
Step 1: Upload the Template to your Docmosis Cloud Account
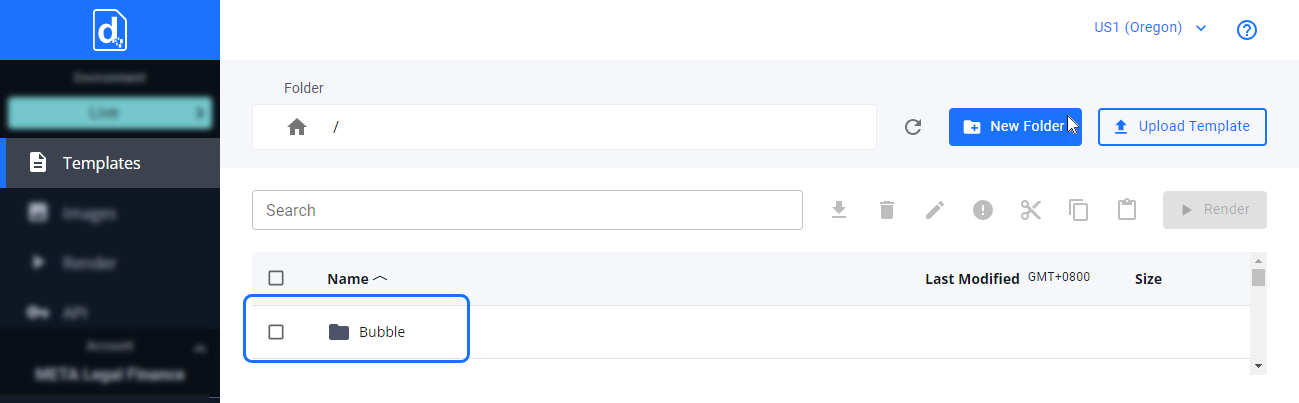
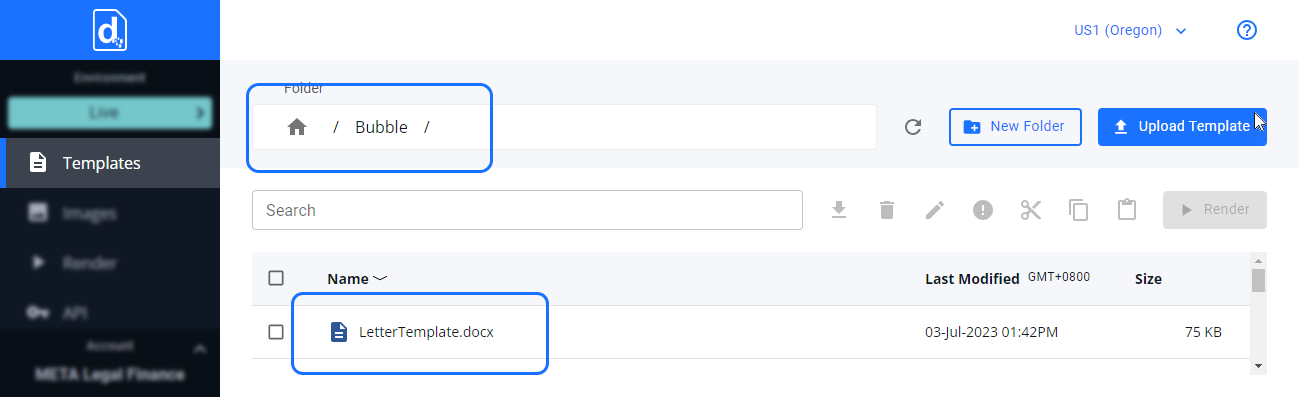
1.A) In this example, in your Docmosis Cloud account, create a top-level folder called "Bubble".
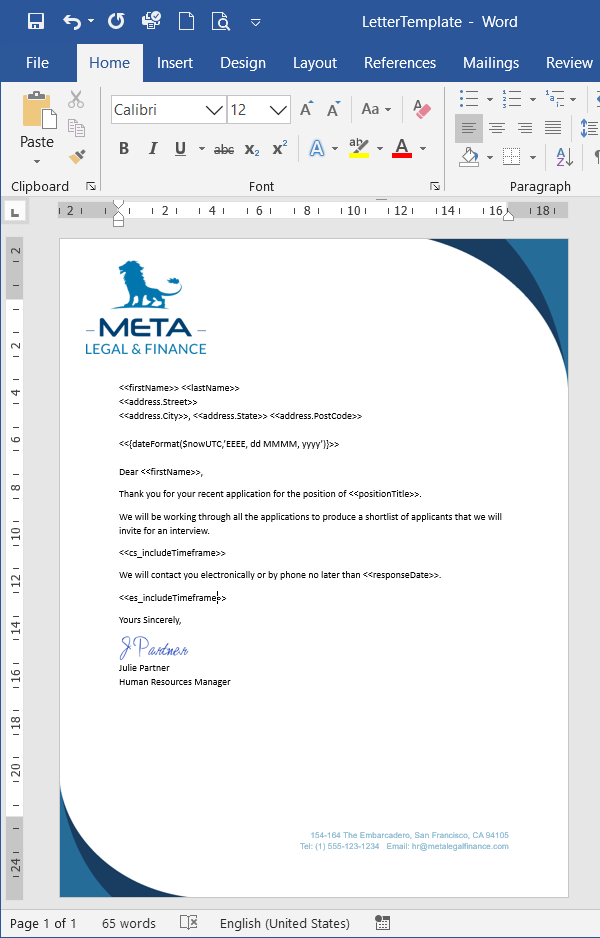
1.B) Next, download the sample Microsoft Word template using the link below.
Note: If you open the template in Microsoft Word you will see the fields that Docmosis will replace with data. They look like this: <<firstName>>.
1.C) Upload the template to the Bubble folder in your Docmosis Cloud account. Your account should then look like this:
Step 2: Locate your Docmosis Cloud access key and URL
You will need your access key and URL when setting up the call to Docmosis in your Bubble application. Copy these to an editor such as Notepad, to be used later.
Step 3: Configure your Bubble app to send data to the Docmosis Cloud API
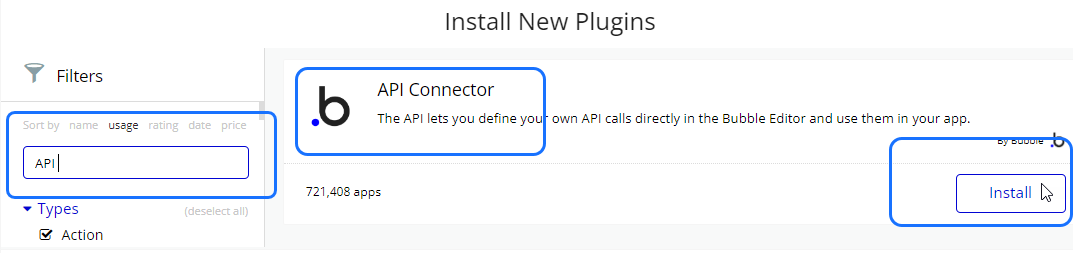
This sample Bubble app makes use of the free Bubble API Connector plugin to send data to the Docmosis Cloud service.
3.A) Install the "API Connector" plugin by clicking on the "Plugins" tab in the left menu and searching for “api”.
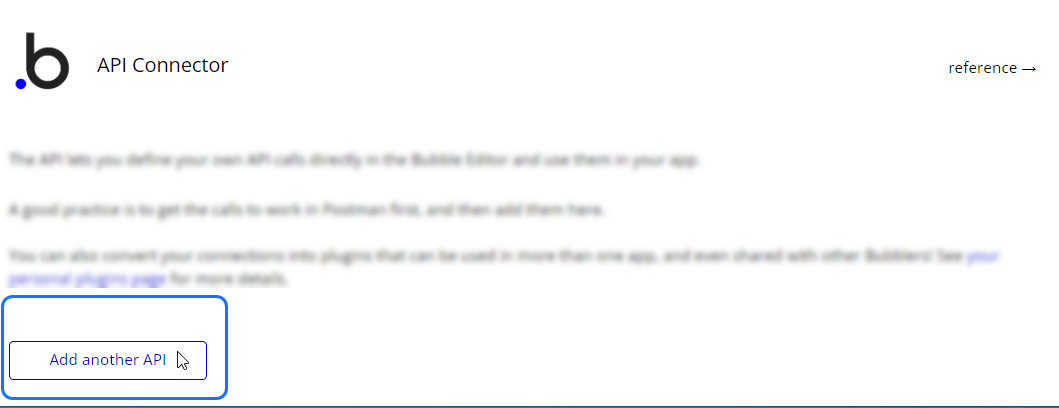
3.B) Click "Add another API" to start configuring the call to the Docmosis Cloud service.
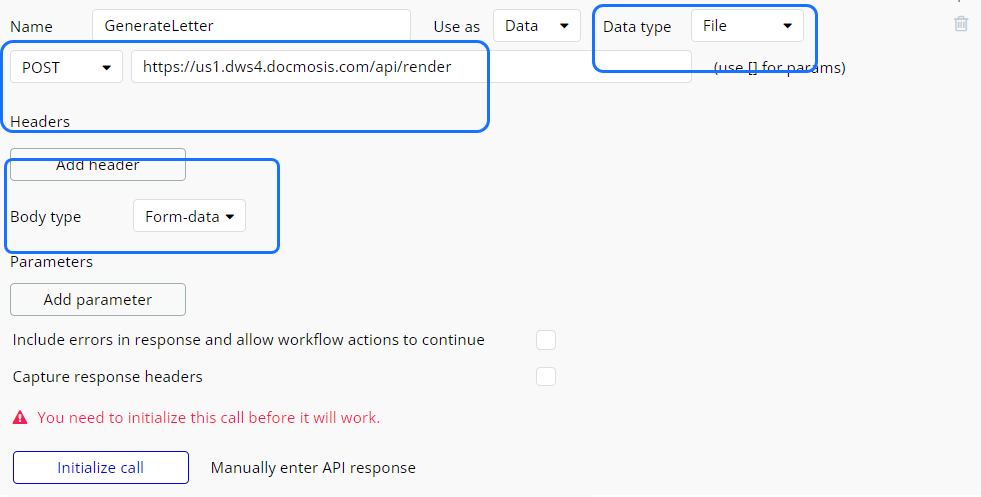
3.C) Choose an "API Name", we used "Docmosis", and a "Name" for the API call, we used "GenerateLetter". Leave Authentication set to "None or self-handled".
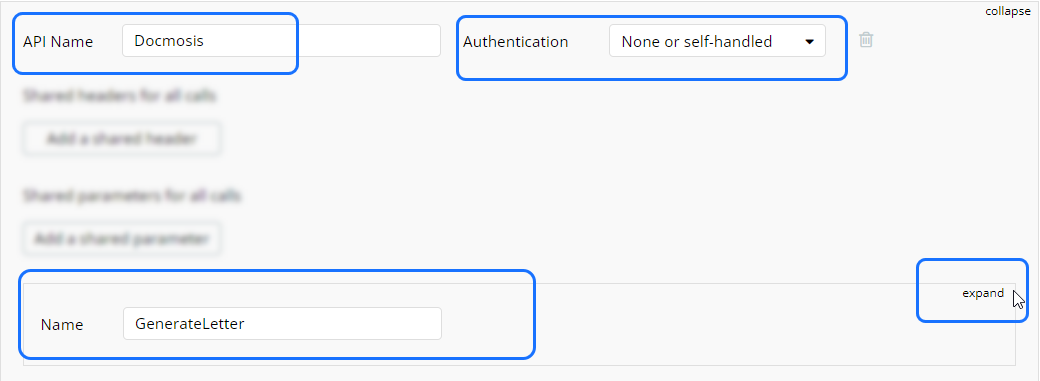
3.D) Click "expand" then:
- Set "Data type" to "File";
- Set "Use as" to "Data";
- Set "Method" to "POST";
- Set "URL" to the URL from Step 2 above;
- Append "render" to the URL;
- Set "Body type" to "Form-data".
Note: The image below is using the "US" endpoint. You can find complete information about the Docmosis processing locations and endpoints like "/render" in the Web Services Guide available in Documentation.
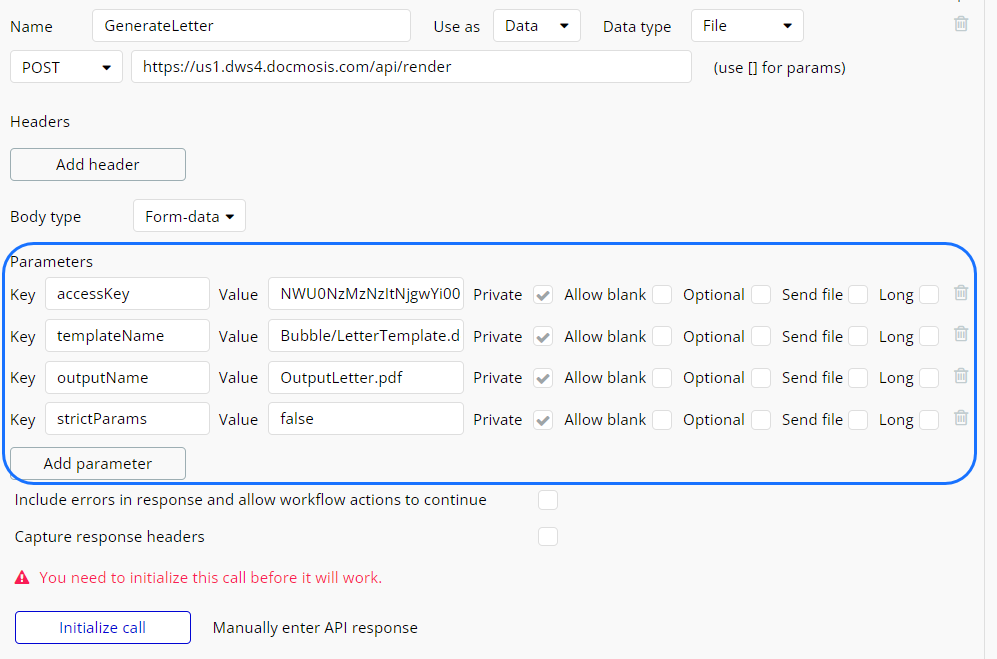
3.E) Use the "Add parameter" button to add three new parameters.
Note: the parameters are case sensitive. So "accessKey" needs a capital "K".
- Set the accessKey to your Docmosis account access key (see Step 2, above).
- The templateName includes the name of the folder where you uploaded the sample template. (If you followed Step 1.C it should be "Bubble/LetterTemplate.docx".)
- Set the outputName to a name with extension. In this example, we have used "OutputLetter.pdf".
- Set strictParams to false. This allows parameters to be added to the call (in step 3.G) that will then be used to populate the fields in the template.
For the outputName, the "pdf" file extension is how Docmosis knows what format to generate. You could change this to "docx" or "txt" to generate a different output format.
Note: If required, the name used for "outputName" can be different for each generated document. See this article on how to: Dynamically set the output file name.
3.F) Click initialize call, if everything is entered correctly you should get the following:
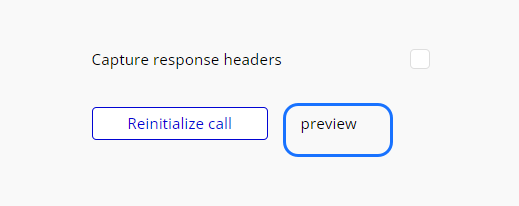
Note: By initializing the call you are actually generating a sample document. The "preview" link will download the document, but it will be called "api_initialize_file". If you rename the file to "something.pdf" (ie. with a ".pdf" extension) and open it - you will be able to view the file.
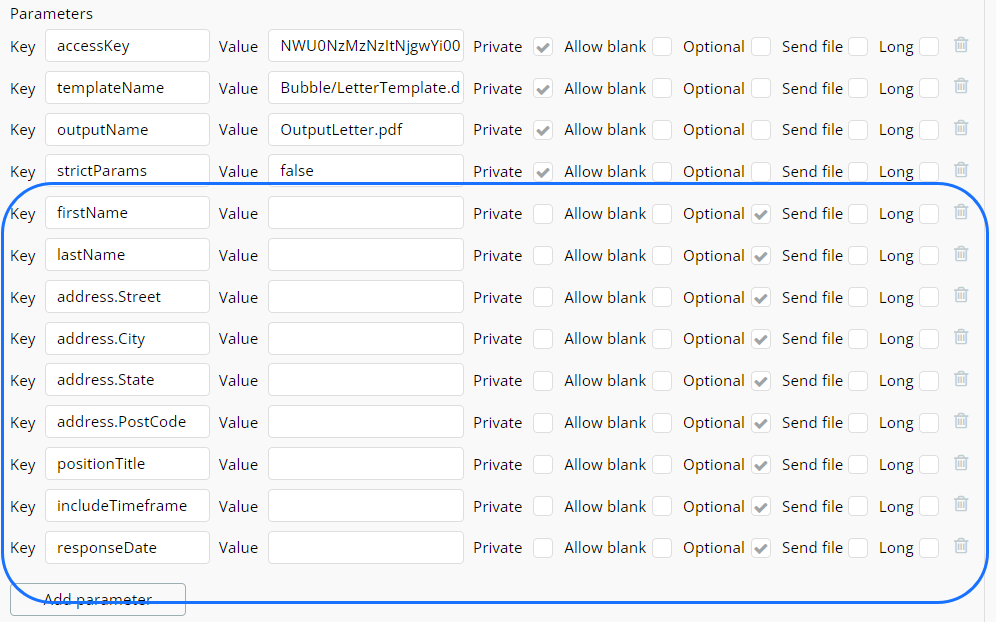
3.G) Now you should add more parameters to the call - one for each field in the template.
In this example, the <<firstName>> field in the LetterTemplate.docx will require a matching "firstName" Key/Value pair as part of the call to Docmosis.
Leave the "Value" blank and deselect "Private" so that the value of the parameter can be populated dynamically from an input field in your Bubble app.
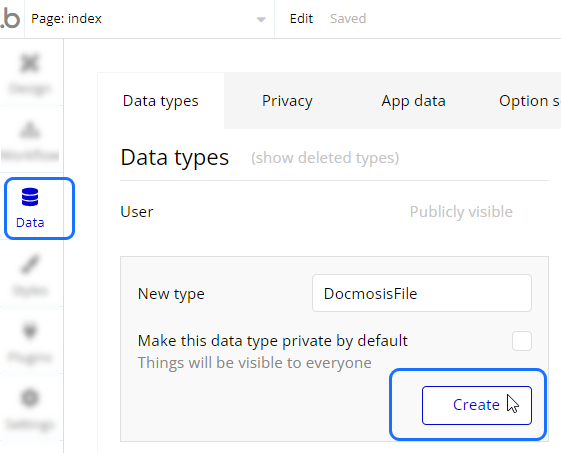
Step 4: Create a new Data Type to store the generated File
4.A) Click on the "Data" tab in the left menu. Under the "Data types" tab, type a name for the "New type" and click Create:
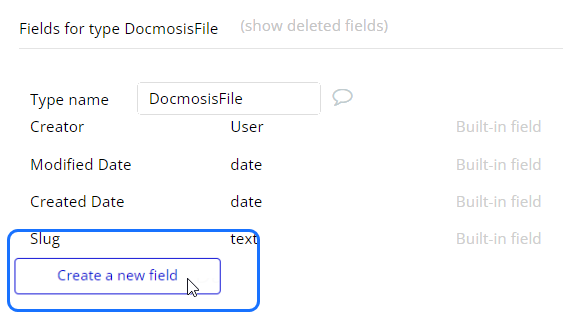
4.B) Now click on the "Create a new field" button:
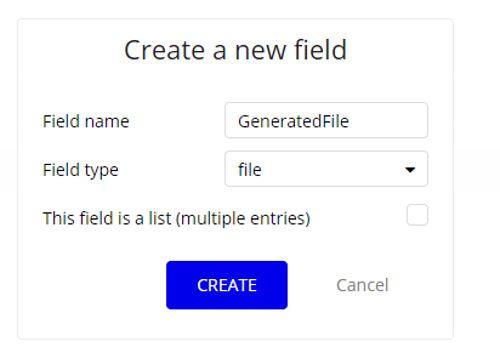
4.C) And add a new field of type "file", we used the name "GeneratedFile". Click on Create. This data type will be used to store the response from the call to the Docmosis Cloud API in Step 3.
Step 5: Create a web form to collect the data
5.A) Using the Design tab, add an "Input" field to collect data.
Note: Please refer to the Bubble "help" documentation for comprehensive instructions on building a web application.

5.B) An input field is needed for each field <<…>> within the Docmosis template. Once finished our form looks like this.
Note: the button added at the end of the form will be used to trigger the document generation workflow.

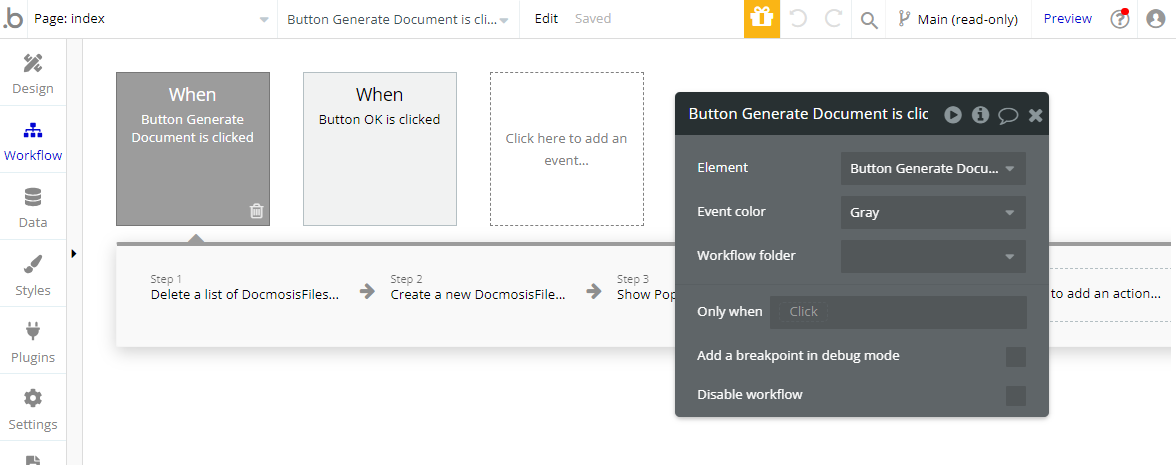
Step 6: Create a workflow to call the Docmosis API
6.A) Select the button you wish to use to trigger the document generation and click Start/Edit Workflow.
6.B) Step 1 of the workflow is to create the new Data Object (thing). Click on "Click here to add an action"… and select the Data (Things) tab and then click "Create a new thing...".
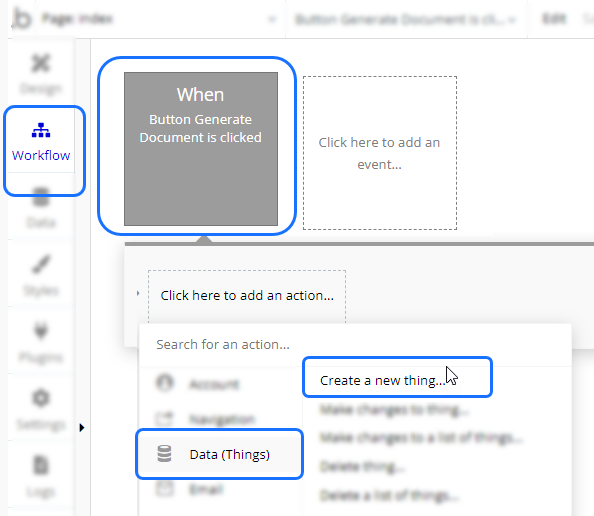
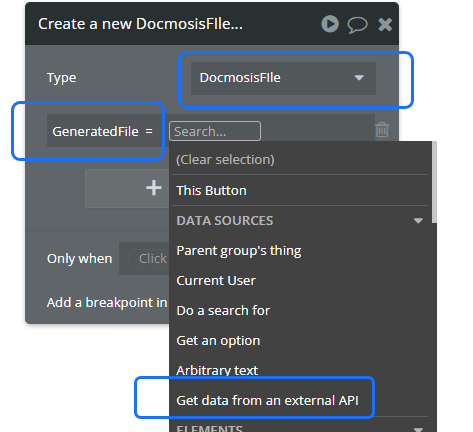
6.C) For the "Type" select the data type you created in step 4.B (DocmosisFile). Click "Set another field" and select the file field of your thing (GeneratedFile) from step 4.C and set this to "Get data from an external API".
Note: It is this step that is ensuring the file generated by Docmosis will be stored by Bubble.
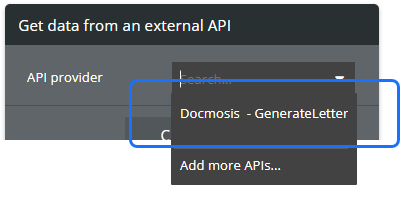
6.D) Now select the API you created in step 3.C "Docmosis - GenerateLetter".
6.E) Now you can link the value of each parameter to an input field from the form you created in step 5.

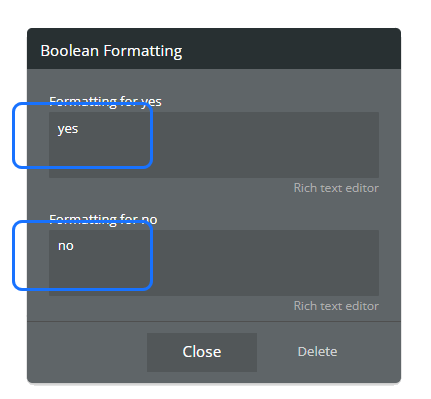
Note: For "checkbox" input types you will need to use "formatted as text". Set "Formatting for yes" to "true" and "no" to "false".
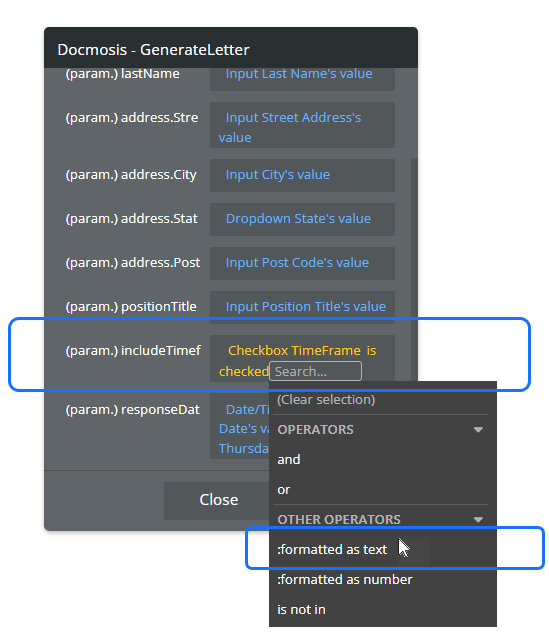
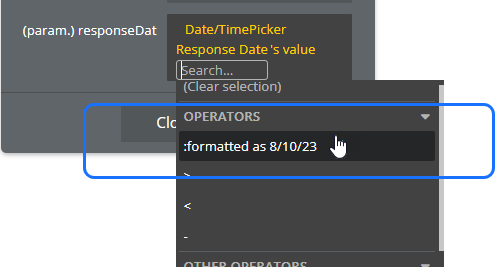
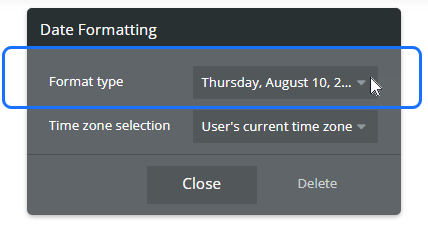
Note: For date/time input you can choose how you want the Date to be displayed in the generated document.
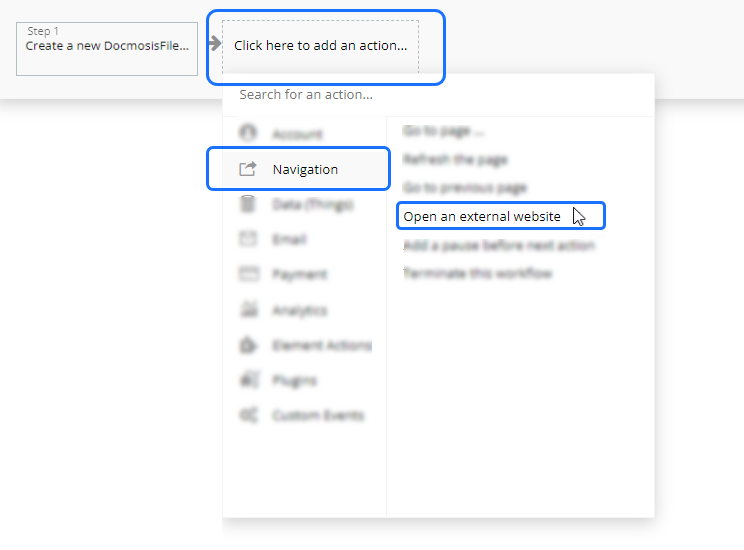
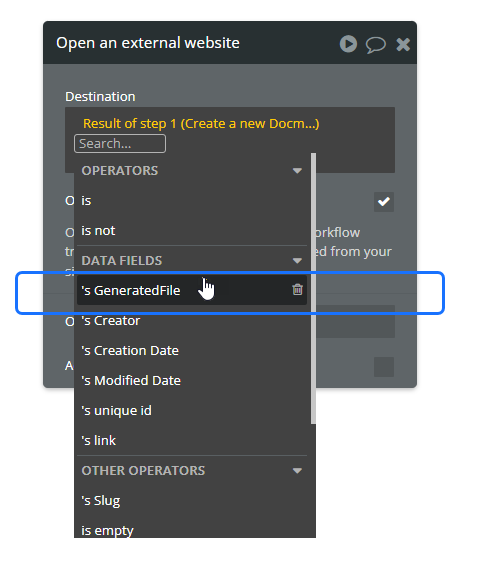
6.F) Step 3 of the workflow is to download the file that was just generated. Click on "Click here to add an action…" and select the "Navigation" tab and then click "Open an external website".
6.G) Click "Insert Dynamic Data" and set the Destination to "Result of Step 2 (Create a new…)" and then " ‘s GeneratedFile"
Note: In our example app we have an additional step that deletes files more than 5 minutes old. This is optional and is used to keep our example app from filling up with files.
That’s it - you're Finished!
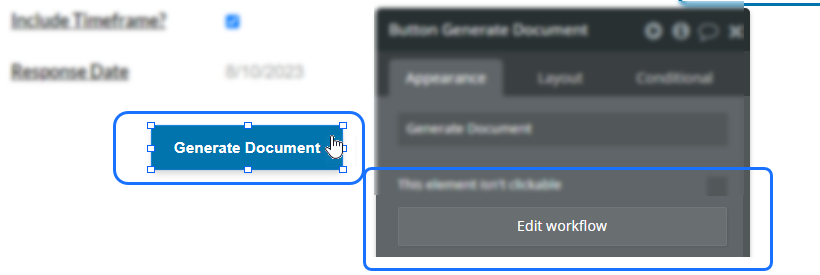
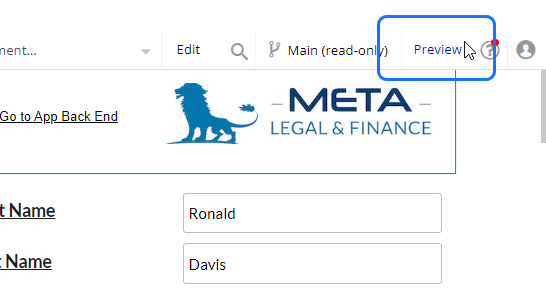
Now if you "preview" your app, and select the "Generate Document" button - you should receive a completed PDF.
If you followed our guide and need help please contact support.
Key Resources
- Try the front-end of our Bubble app
- Explore the back-end (read only) of our Bubble app
- Start a Docmosis Cloud free trial here.
- Download the sample letter template used in this example.
