Docmosis Cloud is a template-based document generation service that can be used via a REST API.
This article is a step-by-step guide to:
- creating a web form with FormAssembly.
- sending data, collected by the form, to the Docmosis Cloud API using a FormAssembly Connector.
- generating a custom PDF document based on the data.
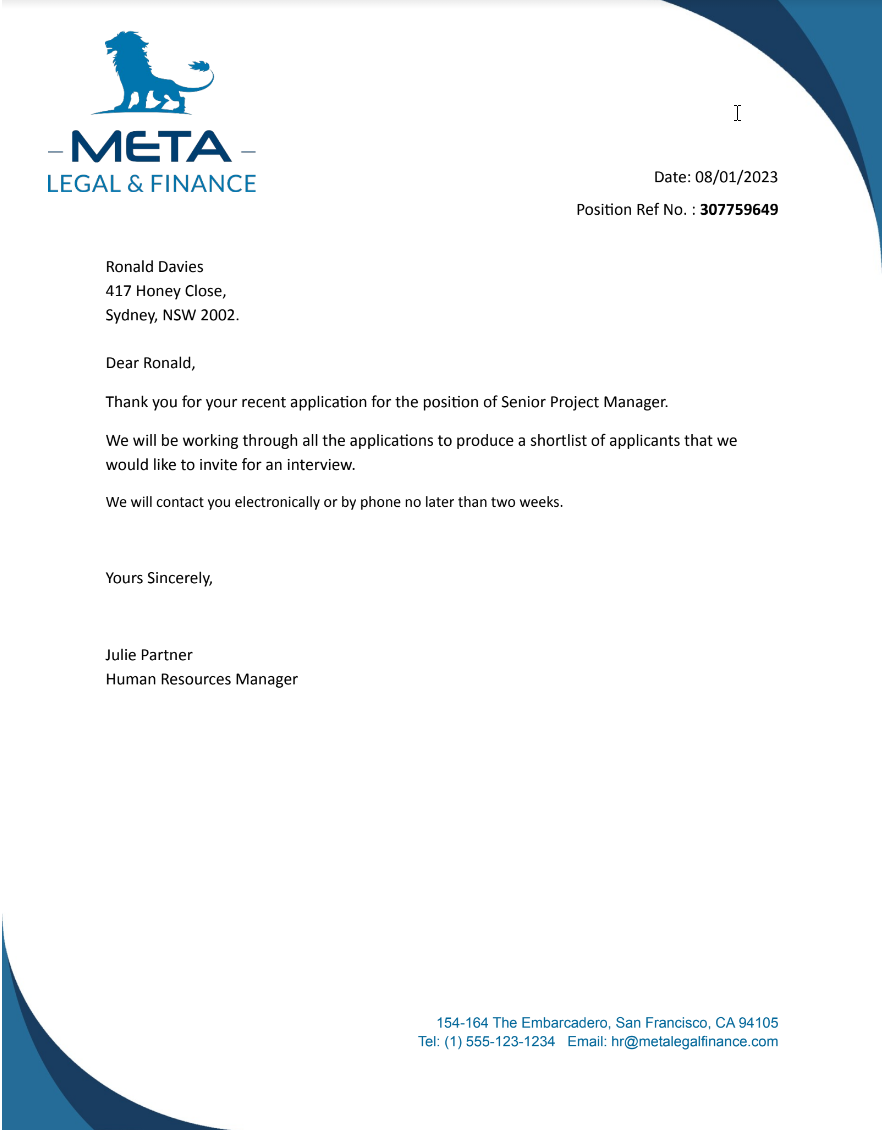
Completing and submitting the web form will trigger the generation of a PDF letter, like this:
 Download the generated document
Setting up Docmosis
Step 1: Login to the Cloud console
If you don't already have a Cloud account, you can sign up for a free trial here.
Once you have an account, log in to the Cloud console.
Step 2: Download the sample template
Docmosis templates are ordinary Microsoft Word documents, with special placeholders that Docmosis replaces with data when it generates the document.
Download the sample template below. The template is ready to use, without any further changes.
 LetterTemplateForFormAssembly.docx
Step 3: Upload the sample template
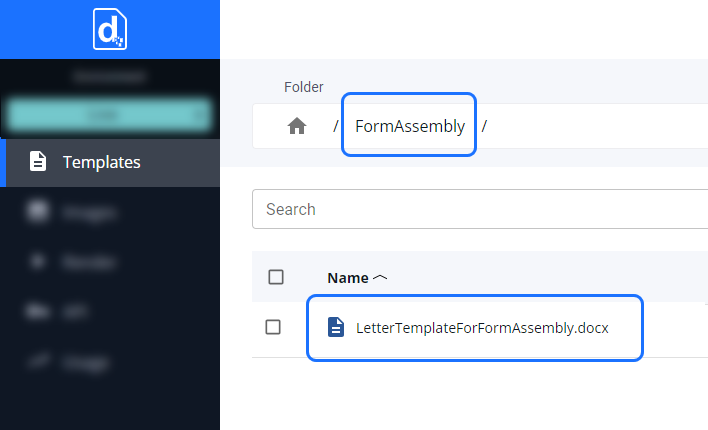
Create a new top-level folder to help organize your templates. In this case the folder is named FormAssembly.
Upload the LetterTemplateForFormAssembly.docx template to the new folder.
Step 4: Find the API access key and URL
Locate the Docmosis Cloud API access key and URL. These will be required when setting up the call to the API in the FormAssembly HTTPS Connector. Copy these to an editor such as Notepad, to be used later.
Note: In this example, we will use the US (Oregon) processing location in the Docmosis Cloud service, for storing the template and generating the document. You can use your preferred processing location, when following this example.
Setting up FormAssembly
Step 5: Login to FormAssembly
If you don't have a FormAssembly account, start a trial here.
Once you have an account, login to FormAssembly.
Step 6. Create a new web form
In FormAssembly, we will use the “Apply for a Position” form from the template library.
- Select Template Library from the side menu.
- Filter on the Human Resources (HR) category.
- Click Use on the Apply for a Position template.
Note: This form was chosen as most of the fields are a close match for the LetterTemplateForFormAssembly.docx placeholders.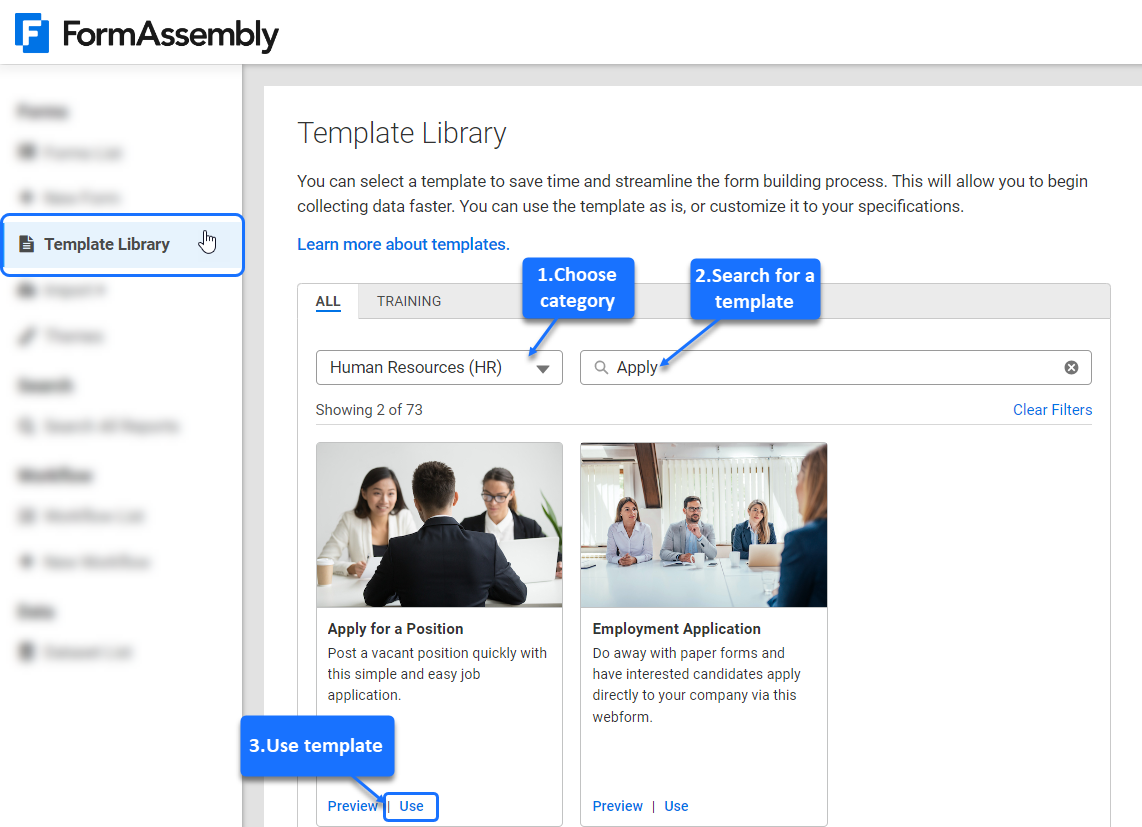
Step 7. Customize the form
Select the Build tab, then follow the create a new webform - guide to customize the form.
Add content to the form, if additional input fields are required, and format the fields if necessary (this includes setting a field as required).
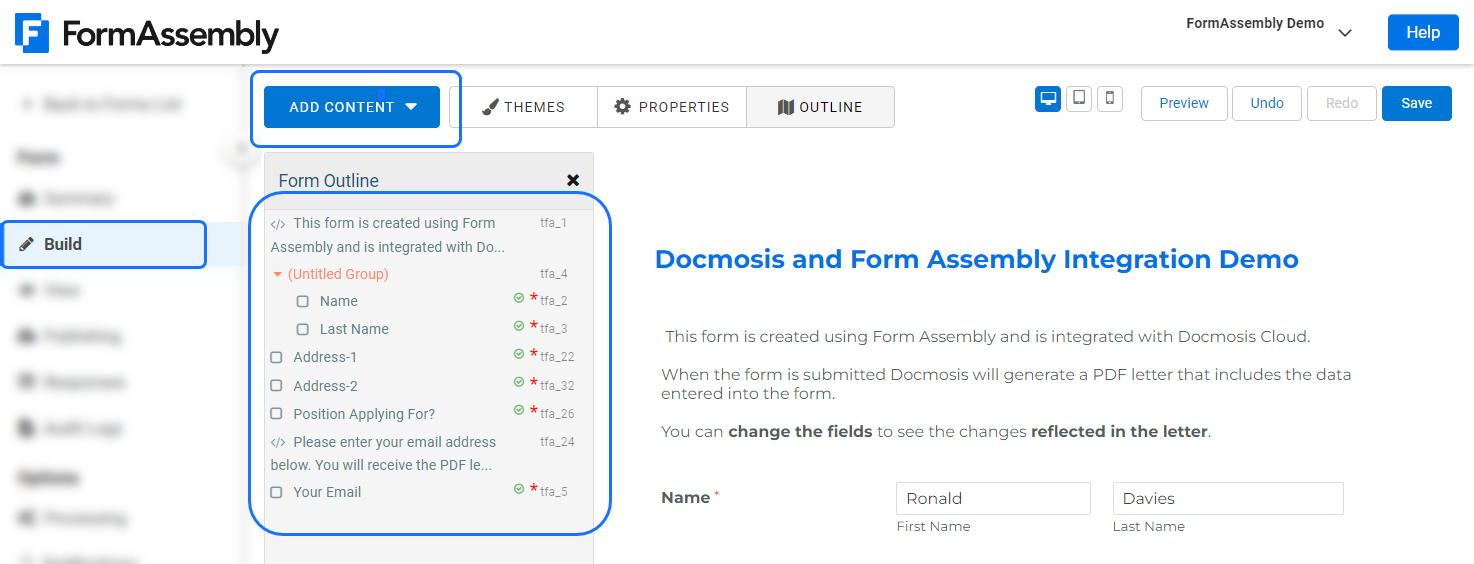
In this example, the Title is updated to "Docmosis and Form Assembly Integration Demo " and the fields "Name","Address-1","Address-2" , and "Position applying for", "Your Email" are set as required fields.
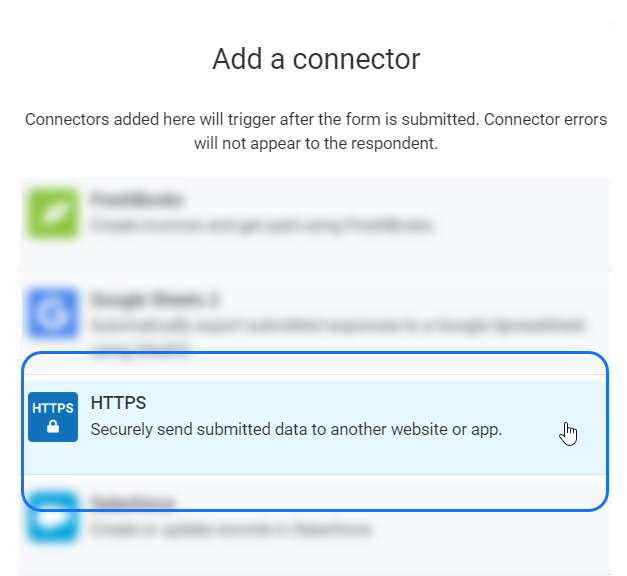
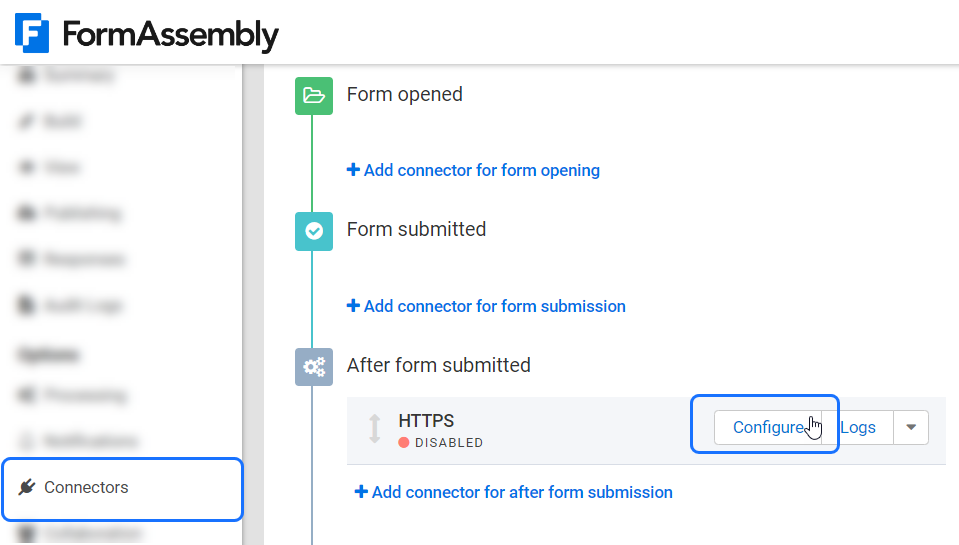
Step 8: Add an HTTPS Connector
FormAssembly Connectors securely send data to another website or app based on various triggers.
Click on Connectors in the side menu, then click on Add connector for after form submission.
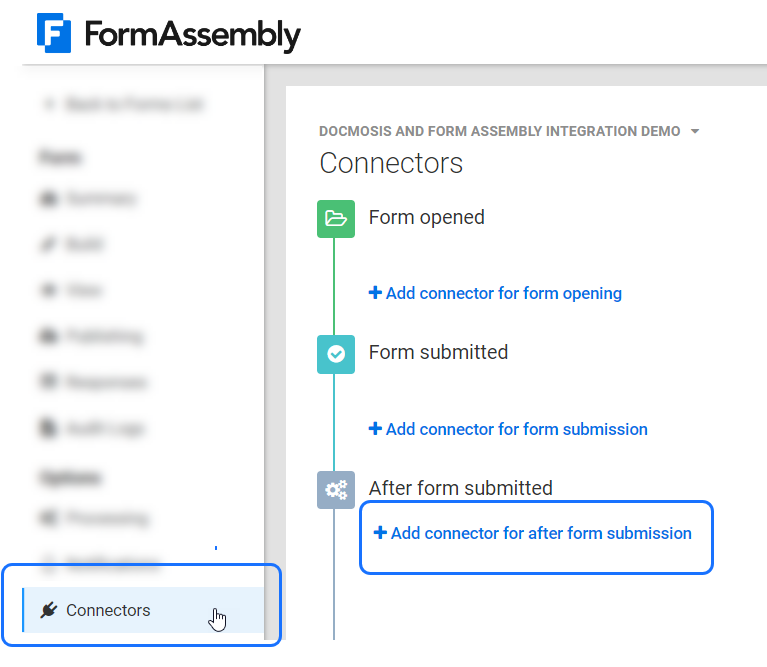
Choose HTTPS to "securely send submitted data to another website or app".
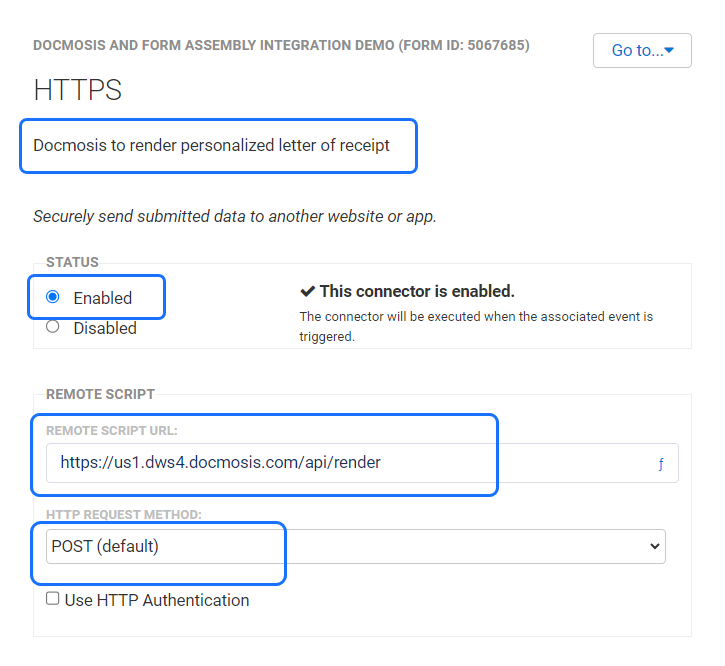
Step 9: Configure the connector to call the Docmosis Cloud API
Click Configure to edit the connector.
- Optionally update the connector's description. We used "Docmosis to render personalized letter of receipt.".
- Select Enabled for STATUS.
- Paste the Docmosis base URL for your preferred processing location into the REMOTE SCRIPT URL edit box. (from Step 4.)
- Append the base URL with "render" in the REMOTE SCRIPT URL edit box.
- Select POST (default) as the HTTP REQUEST METHOD.
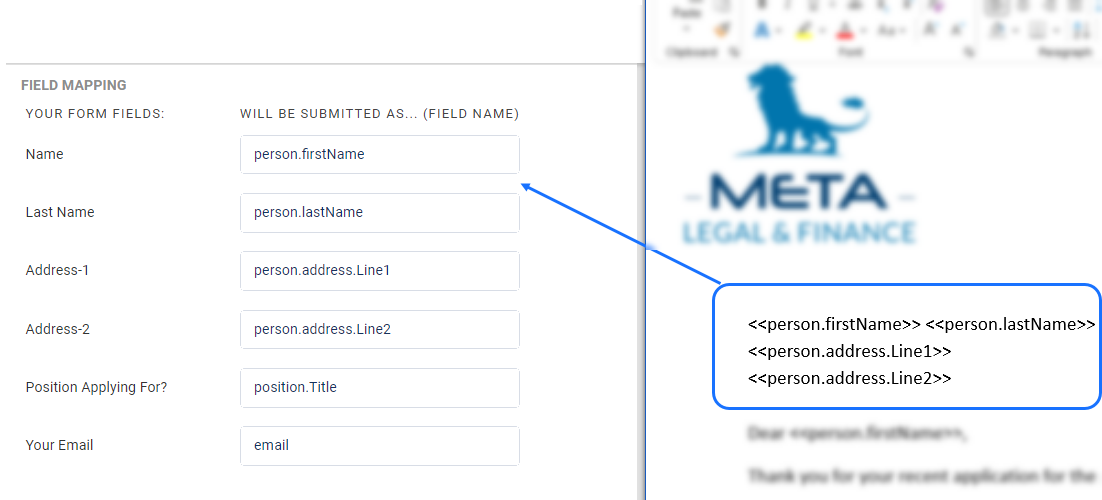
Step 10: Map the form fields to the template placeholders
In the connector, enter the name of each placeholders corresponding to each form field. The Docmosis placeholders are case sensitive.
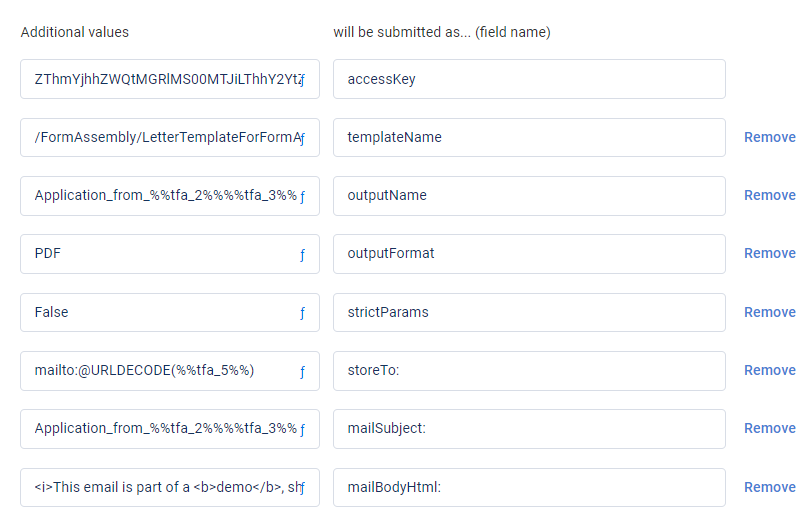
Step 11: Add these required fields to the connector
Apart from the data collected by the form, additional information can be sent to the "/render" endpoint.
The following Values and Field Names are extra instructions that must be present when calling "/render".
Click Add another custom field to add each of these additional values:
| Additional values | Field Name | Details |
| ZWNkZGY1NjEtOTQ4OC00MmN... | accessKey | Paste in the access key for your Docmosis Cloud account (from Step 4.) |
| /FormAssembly/LetterTemplate.docx | templateName | The folder name and template name in Docmosis |
| Application_from_%%tfa_2%%%%tfa_3%% | outputName | Use the formula f option to build up a file name that includes the applicant first name and last name |
| outputFormat | This is the format of the rendered document | |
| False | strictParams | Set to False as the Field Names are a mixture of render instructions and data. |
Note: the full list of all possible settings is in the Cloud Web Services Guide..
Step 12: Add delivery instructions to the connector
The generated document will be delivered by email.
Click Add another custom field to add each of these additional values:
| Additional values(in this example) | Field Name | Details |
| mailto:This email address is being protected from spambots. You need JavaScript enabled to view it. | storeTo | Your email address. Used for delivery of the generated document. |
| Application_from_%%tfa_2%%%%tfa_3%% | mailSubject | Use the formula f option to build up a subject line that includes the applicant first name and last name |
| <i>This email is part of a <b>demo</b>, showcasing the integration between <b>FormAssembly and Docmosis.</b></i> | mailBodyHtml | This is the body of email. |
Note: the mailto: email address must be the same one used to Login to your Docmosis Cloud account. If you are on a free trial, you are restricted to only sending emails to yourself. To remove this limitation, on paid accounts, please contact Support.
Once steps 11 and 12 are complete the screen should look like this:
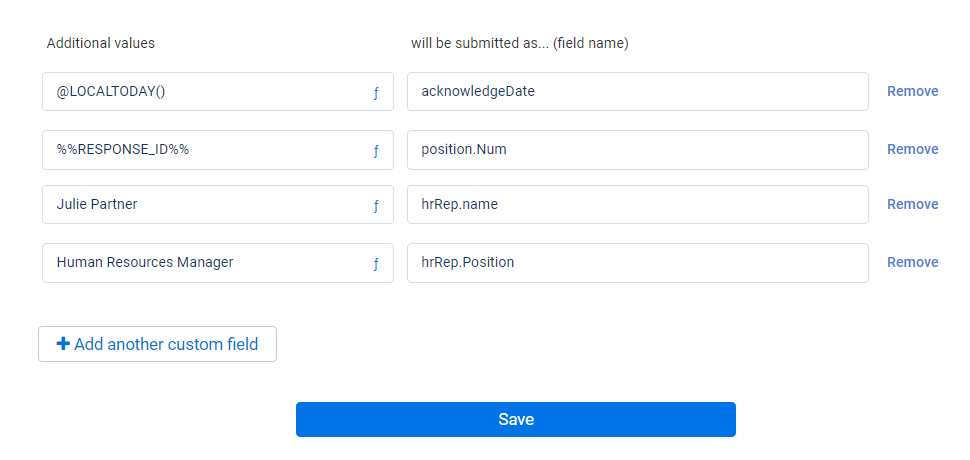
Step 13. Add more data to the connector
The following values and field names are extra data, that were not collected by the form. Each of the field names match a placeholder in the template, eg: <<acknowledgedate>>, and they will appear in the generated document.
Click Add another custom field to add each of these additional values:
| Additional values (in this example) | Field Name | Details |
| @LOCALTODAY() | acknowledgedate | Use the formula f option for the local current date |
| %%RESPONSE_ID%% | position.Num | Type in a constant value (your own value) |
| Julie Partner | hrRep.Name | Type in a constant value (your own value) |
| Human Resources Manager | hrRep.Position | Type in a constant value (your own value) |
Click Save to save the changes to the connector, which should look like this:
Try out the new integration
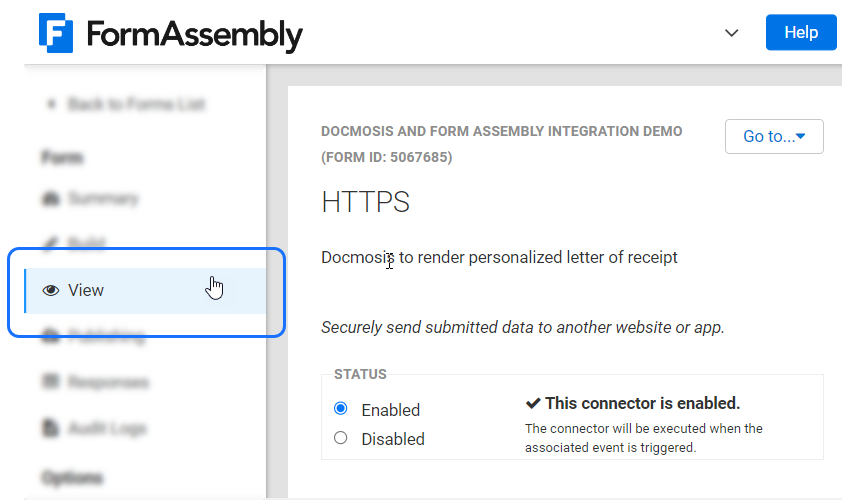
Step 14: View the form
In FormAssembly, click View in the side menu to view the form.
Step 15: Enter values and submit the form
Enter the values in the form, then Submit.
The connector sends the data to the Cloud API. The service merges the data with LetterTemplateForFormAssembly.docx to generate a PDF document.
The generated document will be sent via email, with the document as an attachment, to the email address that was supplied for the storeTo: field in Step 7.A. 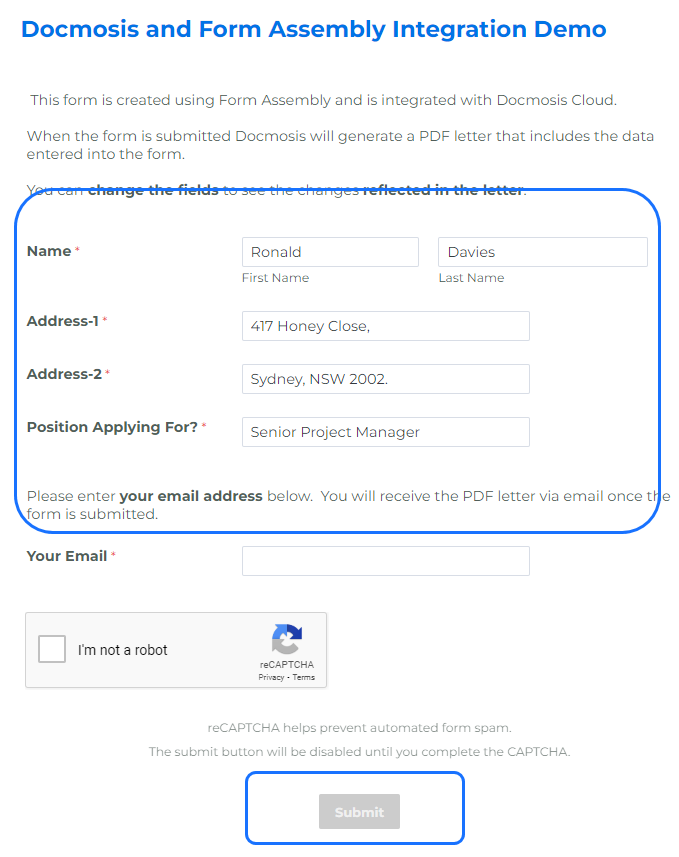
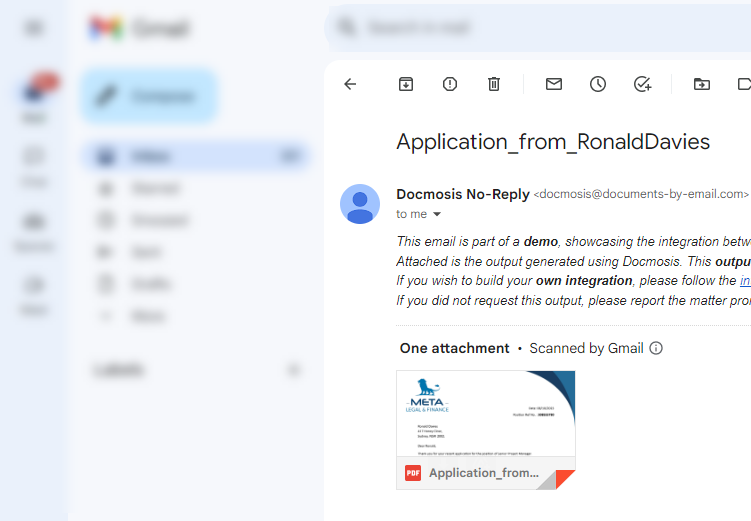
Step 16: Check for the email
Check your inbox for an email with the generated PDF as an attachment.
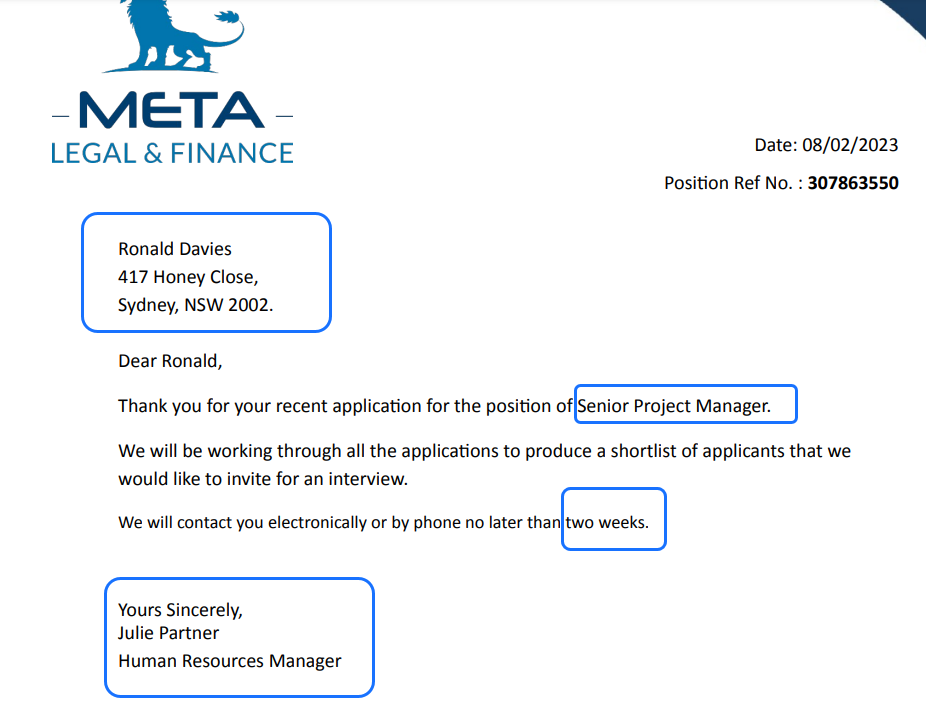
The PDF letter contains the data captured in the form as shown below:
Troubleshooting
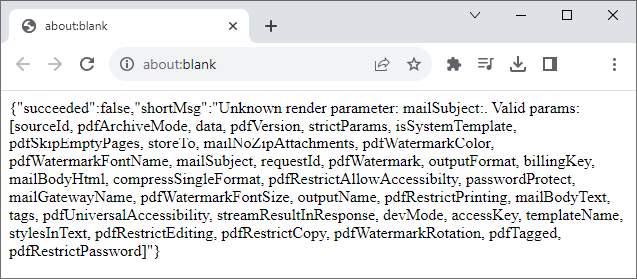
If you do not get the expected results, read the message in the Connector log in FormAssembly to troubleshoot the issue.

To view the response message from Docmosis, click Show received data for a log.
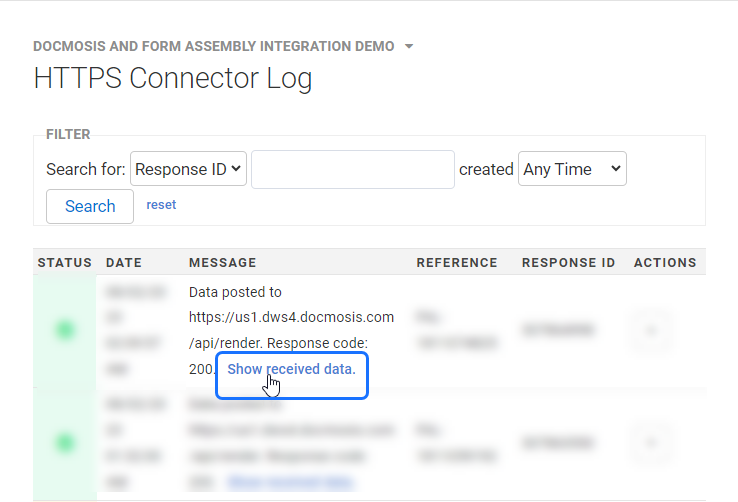
Below is an example of a response message for a call that failed, because the "strictParams" was not set to False.