

A multi-page insurance certificate.
This example uses lots of tables to show the items covered by an insurance policy.
It illustrates how tables can be conditionally “added or removed” and “repeated” by using the <<cs_ and <<rs_ Docmosis elements.
The header, footer and body sections of the certificate all utilize tables to effectively layout and format the required information.
This example in detail
International date-time formatting
This template shows examples of how the built-in dateFormat function can be used to achieve date formatting for a German audience.
The actual strings used to define the input and output formats are passed in as data, together with the actual values themselves.
(JSON example):

The <<{dateFormat (startDateTime, outDateTime, inDateTime)}>> instruction in the template translates to:
![]()
So this: 2021-12-25T17:00:00CET turns into the more readable format: 25 December 2021, 5pm CET
Note: By using single vertical quotes around the 'T' in the input string and the ',' in the output string these will pass through to the output without any “date” interpretation.
Currency formatting
This template also shows examples of using the numFormat function for a German audience.
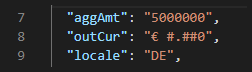
Here the <<{numFormat (aggAmt, outCur, locale)}>> translates to:
![]()
So this: 5000000 turns into a German formatted number in Euros: € 5.000.000
The DE used in the third parameter refers to the German country code and is used to interpret both the numeric data provided as well as to format the output.
* You can find more specific details on the different date and number formatting options for different countries in the relevant Docmosis Template Guide.
Adding or removing tables
By surrounding the separate Business Interruption table with the <<cs_ and <<es_ , it will only appear in the finished document when the data value for busIntReq = “true”.
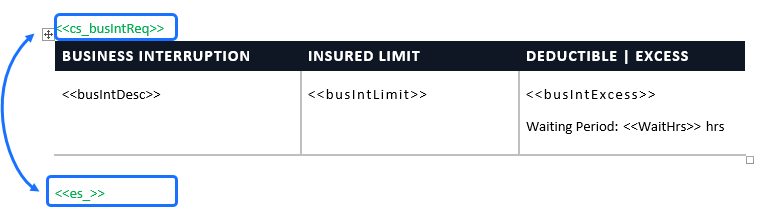
If busIntReq = “false”, then the table will be excluded from the finished document.
For more information and technical examples using the <<cs_ directive, see Conditional Sections and Conditional Sections 2.
Repeating tables
By wrapping <<rs_ and <<es_ around an entire table in your template, it is possible to generate multiple tables. This can be very handy in cases where you might wish to show several tables with the same layout, one after another in the final document.
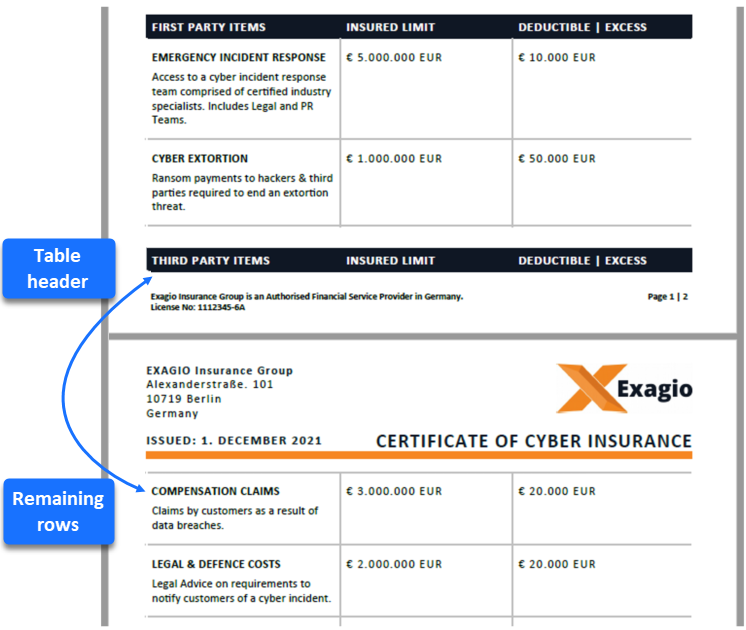
In this section, the <<rs _ and <<es_ syntax is used to generate firstly, a table showing all the First Party Insurance Items and then secondly, a table showing all the Third Party Insurance Items. The information for the different tables is obtained from a nested array of data with "insTypes" and "items".
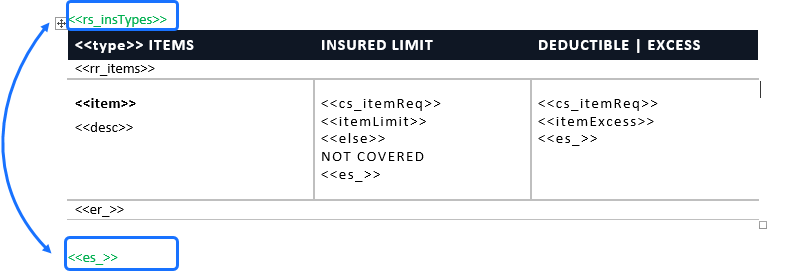
In the case above, the <<type>> field used in the table’s header row, makes it possible to distinguish the purpose for the different tables.
For more information and technical examples using the <<rs_ directive, see Repeating Sections.
Controlling the layout of repeating tables
When designing templates with “repeating” tables, it is important to consider different data scenarios to ensure the tables will always behave in a predictable and desired way.
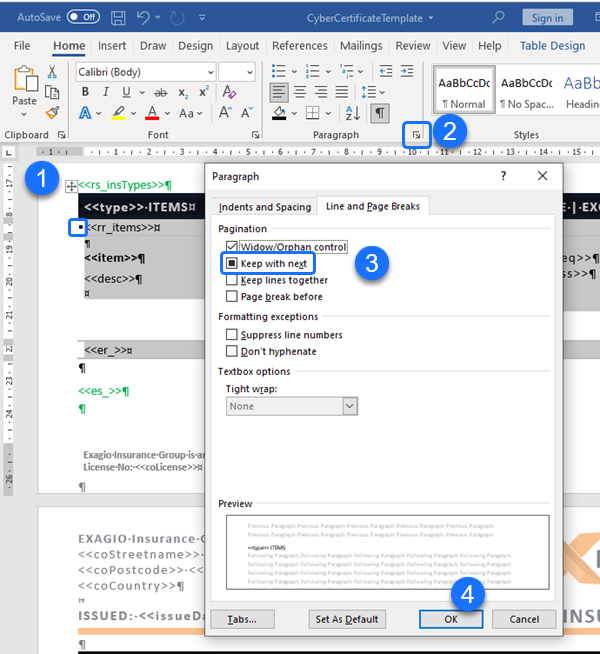
In this example, it would be clearly undesirable to ever have the second table header row show by itself at the bottom of the first page within the finished document.
This unwanted result has been avoided by:
- Selecting both the header row and the <<rr_ row within the table in the template
- Under Paragraph properties, checking the box for Keep with Next
(When hidden characters are shown, this Keep with Next shows as a square dot before the <<rr_ )
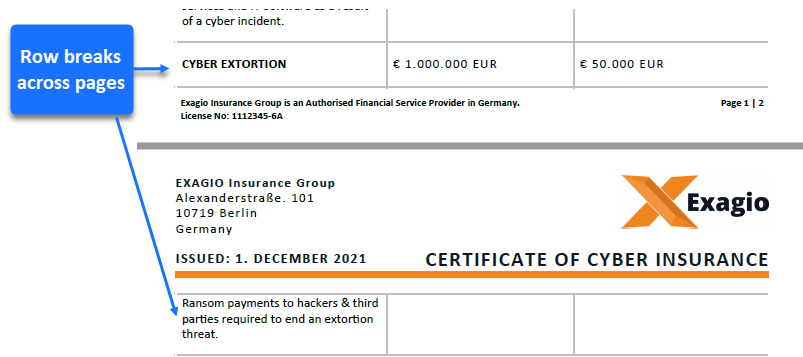
Likewise, a table row with multiple lines of data might break across two pages, as shown below:
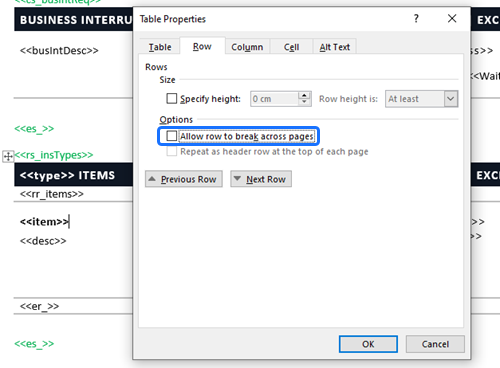
To prevent this from happening, right-click on the table in the template and select Table Properties, then deselect "Allow row to break across pages".
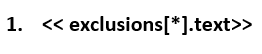
Use of the [*] range specifier
In situations where it is known that an array will have at least one element, it is possible to use the concise [*] notation to display “all” the elements. In the example below, the range specifier is used to show “all” the exclusions in the policy array as a numbered list.
Design techniques
To create a standout document, this template uses:
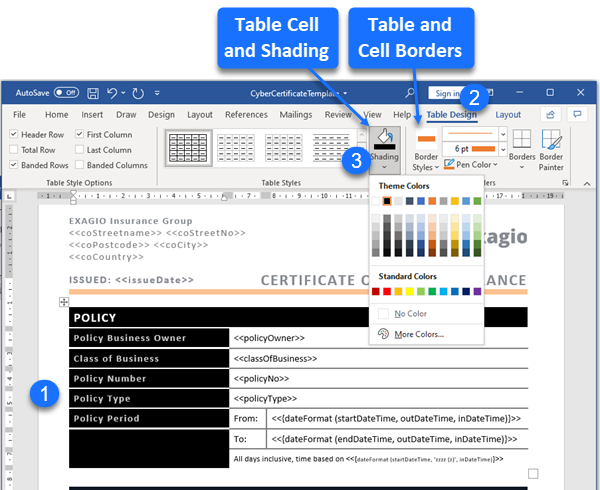
- White text with bold formatting on dark shaded table cells – useful for highlighting key policy information!
- A thick 6pt orange bottom border in the “header table”. This helps to delineate the header section from the body of the document.
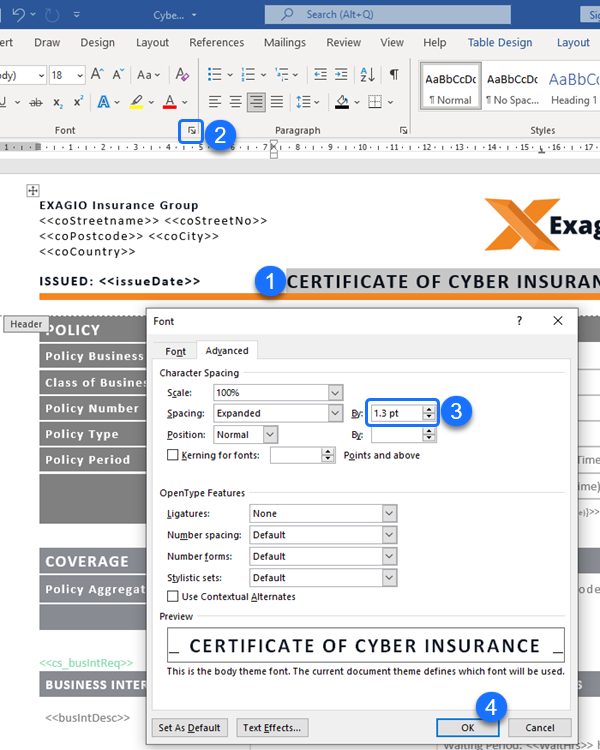
- Expanded character spacing used for the headings and numbers which helps to highlight significant information.
Try this
- Experiment with table Shading and Border Styles (as shown above).
- Select some text in your template, then open the Font box, choose the Advanced tab, and then expand the character spacing (as shown below).