


A sample version of a prospectus.
The template generates a personalized prospectus, showing information on the specific courses that a student wishes to study at a named institute.
Example in detail
This example delves into both the Word and Docmosis features required to generate a large, customer-facing document that includes a table of contents page and different sections. It shows one effective way to create cover pages with text and merge fields and background images.
The discussion below covers the use of section breaks, themes and styles, and the display of nested data.
Using section breaks
A large document like a prospectus has sections that require different formatting and page layouts.
In Microsoft Word, section breaks can be used to divide a document into sections.
Once section breaks are inserted, each section can be formatted separately.
For each section, it is possible to specify unique:
- margins
- paper size and orientation
- headers and footers
- page numbering
In the early stages of designing a template, it is worth thinking of the different sections that will be required and then adding in the necessary section breaks.
This prospectus template is divided into four sections by using Section Break (Next Page):
- Section 1 (Cover page, page 1)
- Section 2 (Table of Contents, page 2)
- Section 3 (Content pages, pages 3-8)
- Section 4 (Back page, page 9)
Section Break (Next Page) inserts a section break and starts the new section on the next page.
Select ¶ Show/Hide on the Home ribbon, to see the section break markers in this template.
For example:
To add a Section Break (Next Page), position the cursor at the end of a page (before the next page that will be in the new section). Go to the Layout ribbon tab and select the Breaks drop down menu. From this menu, choose the Next Page option.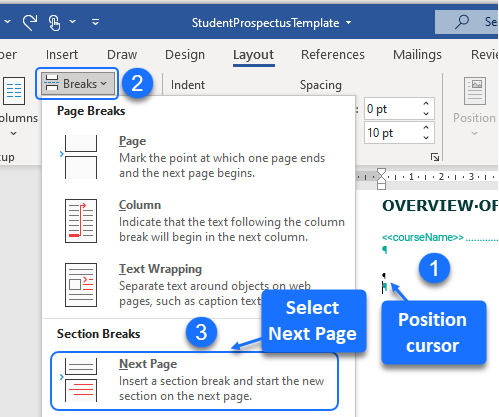
Unlinking headers and footers from previous sections
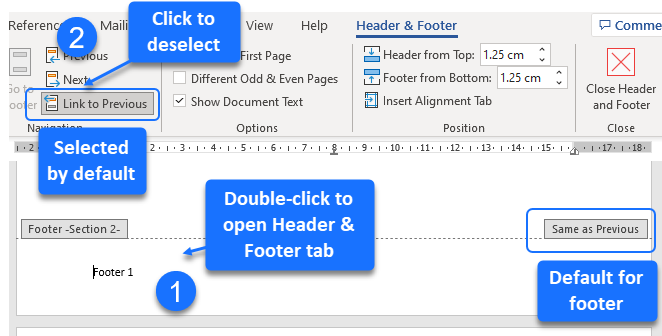
By default, headers and footers are linked to the headers and footers in previous sections.
In this example:
- The header for Section 1 (cover page) includes a page-sized image. This image should not feature in the header of subsequent sections. This required unlinking the header in Section 2 from Section 1.
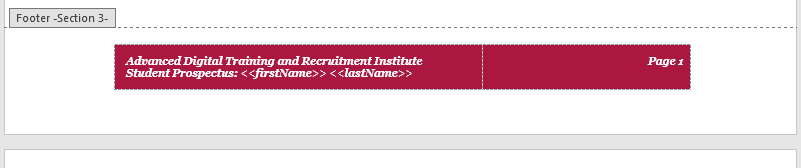
- The red footer below is only required in Section 3. This required unlinking the footer in Section 3 from Section 2. Similarly, this red footer should not appear in Section 4 (Back page). This requires unlinking the footer in Section 4 from Section 3.
To unlink a header (or footer) from the previous section:
- Double-click in the respective header/footer region to open the Header & Footer tab for that header/footer.
- Deselect Link to Previous.
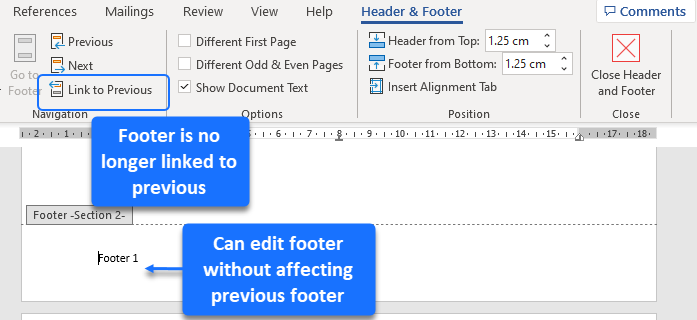
After unlinking sections, it is possible to edit the header or footer content without affecting the previous header/footer. Similarly, it is possible to delete any unwanted header or footer "remnants" from the previous section.
Starting the page numbering at 1 after the table of contents page
A red footer with page numbering is used for the content pages that follow the Table of Contents page.

When this footer is first created, the page number shows as “Page 3” given that it’s the third page in the document.
To change the page numbering to start at “Page 1”:
- Unlink this footer from the previous section.
- Select the page number in the footer.
- In the Header & Footer ribbon, select Page Number > Format Page Numbers.
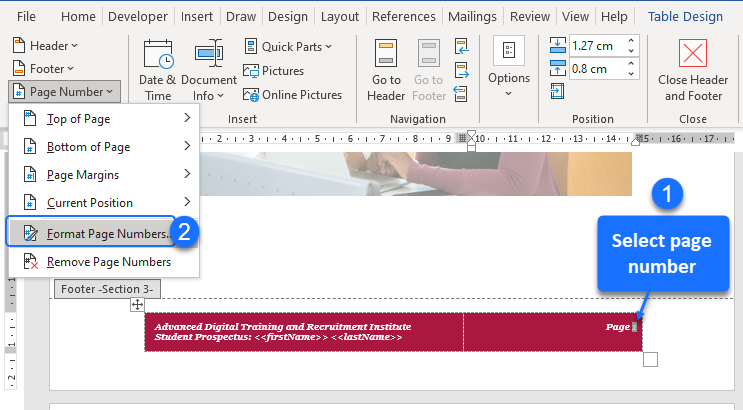
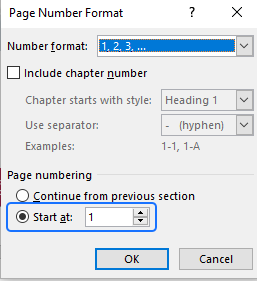
- In the Page Number Format dialog box, select Start at, then select number 1 and click OK.
Using themes
Microsoft Word themes and styles help to keep the color, text and formatting consistent.
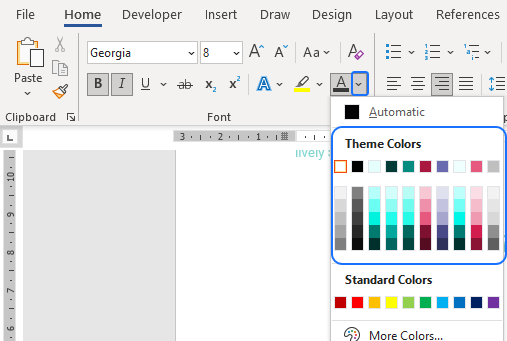
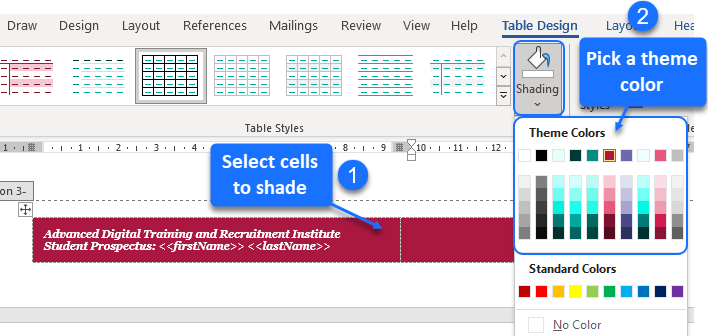
With Microsoft Word’s themes feature, a custom color palette of mainly greens and reds is used throughout the prospectus.
- To see the theme palette, click on the font color arrow on the Home ribbon tab.
Every document created in Microsoft Word has a theme of colors, with the default being the Office theme.
When a new theme is applied, the Office theme is replaced by the new set of colors.
- To choose a new color theme, select from the themes listed under Colors in the Design ribbon tab.

- To create a new theme, select Customize Colors, then swap out some of the colors in the Create New Theme Colors window, and save the theme with a new name.

The new color theme can be applied to the text, tables and styles in the template.
Using styles
Microsoft Word’s Styles feature is used in this template to define the fonts/formatting of the headings and all the other text.
The Styles Gallery on the Home ribbon shows the Word styles that are used in the template.

Most of these are pre-existing Word styles like the Normal, Heading 1 and Heading 2 styles.
These styles have been modified to reflect the ADTR Institute’s style guide in terms of fonts and colors - with application of the new custom color theme.
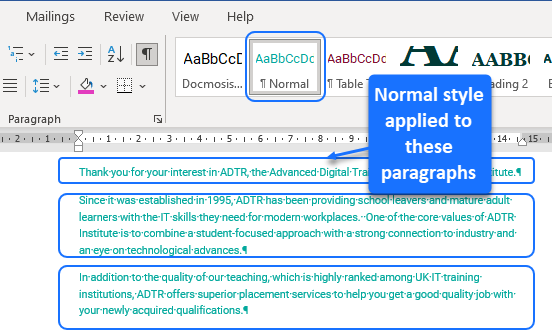
For instance, the Normal style is modified to show text in light green 10pt Roboto font.
This Normal style has been applied to the “normal text” in the prospectus.
There are essentially two ways to modify the font/formatting of a pre-existing Word style: updating a style to match a selection, or modifying a style.
By using styles in templates like this one, it is easy later on to change the look and feel of the finished documents. A change made to any style will automatically be applied to all the text that uses this style in the template.
Using heading styles to create a table of contents page
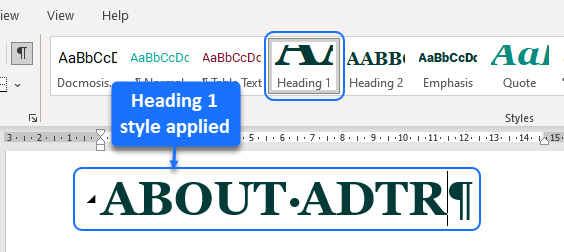
For this template, the major headings use the Heading 1 style.
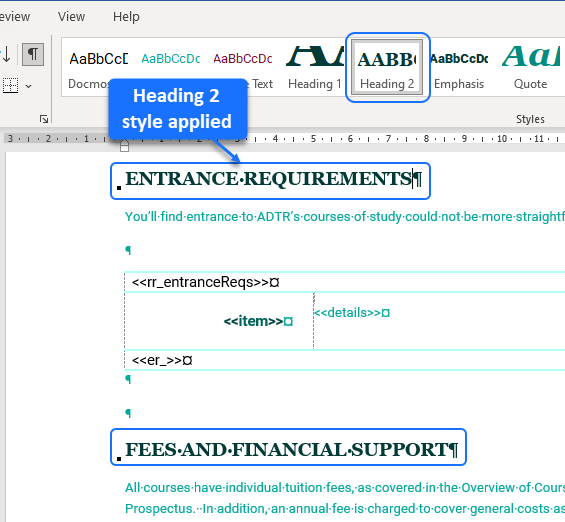
The minor headings use the Heading 2 style.
After the Heading 1 and Heading 2 styles are applied to all headings, a Table of Contents page can be created.
The steps to achieve this are:
- Position the cursor on the blank page reserved for the Table of Contents.
- Open the References tab.
- From the Table of Contents drop-down menu, choose a Table style for the contents page.
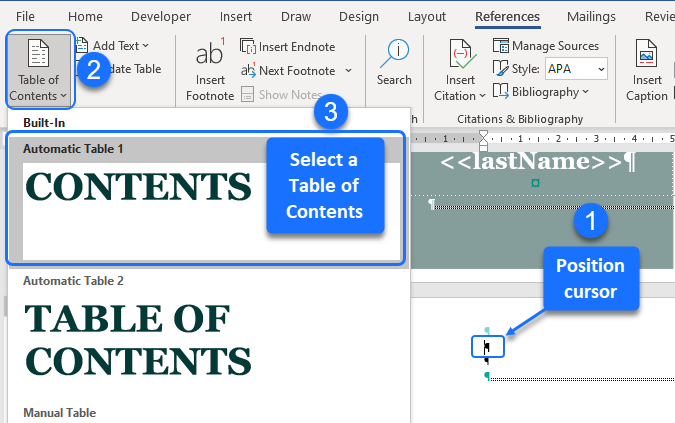
The Table of Contents is inserted.
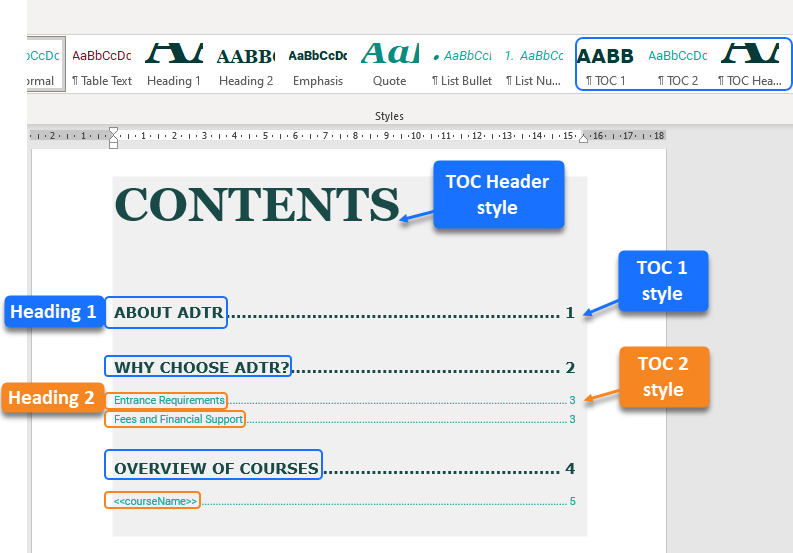
The table of contents magic comes from the pre-existing heading styles used to format the headings. The heading styles control the positioning of the entries on the Contents page, and ensure the Heading 2 entries are nested within Heading 1 entries, similar to a multi-level list.
In Microsoft Word, there are even pre-existing styles to control the font/formatting of the entries on the Contents page. In this example, the pre-existing TOC Heading Style, TOC 1 Style and TOC 2 Styles are modified – and applied to the heading, level 1 and level 2 entries respectively. This customization is done through the Custom Table of Contents option accessible from the Table of Contents drop down menu.
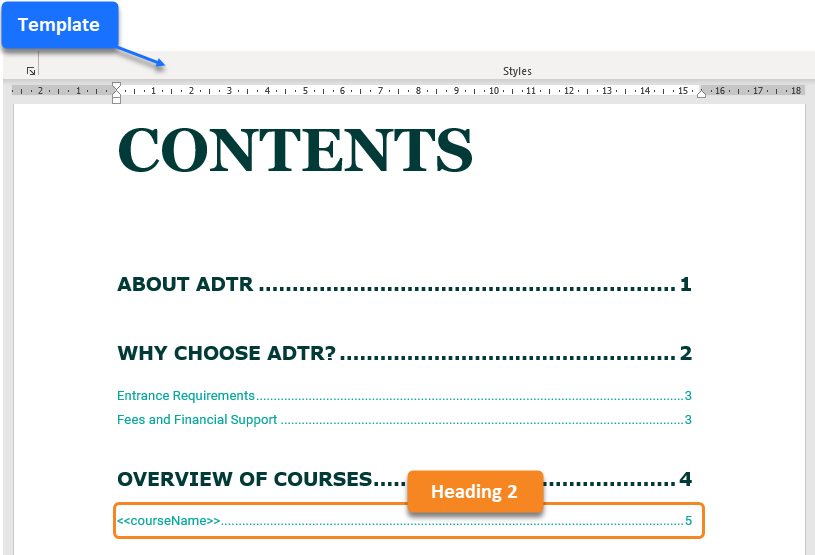
Creating dynamic entries in a table of contents
In a template, a heading can occur within a conditional or repeating section.
If a heading style is applied to this heading, it will be conditionally added or repeated in the Table of Contents.
In this example, the <<rs_chosenCourses>> … <<es_>> repeating section loops over the array of courses for a student, using each <<COURSENAME>> as a heading.
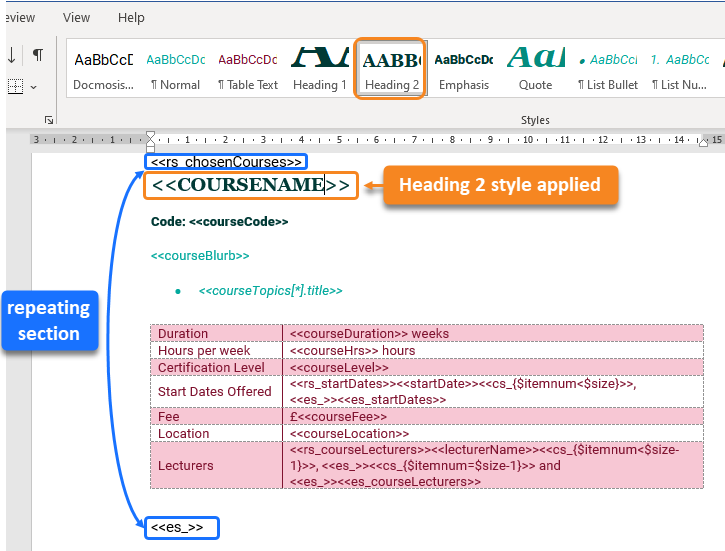
As <<COURSENAME>> is formatted with the Heading 2 style, it automatically appears within the template's Table of Contents.
As the data provides four courses, there will be four corresponding course name entries in the finished Table of Contents.
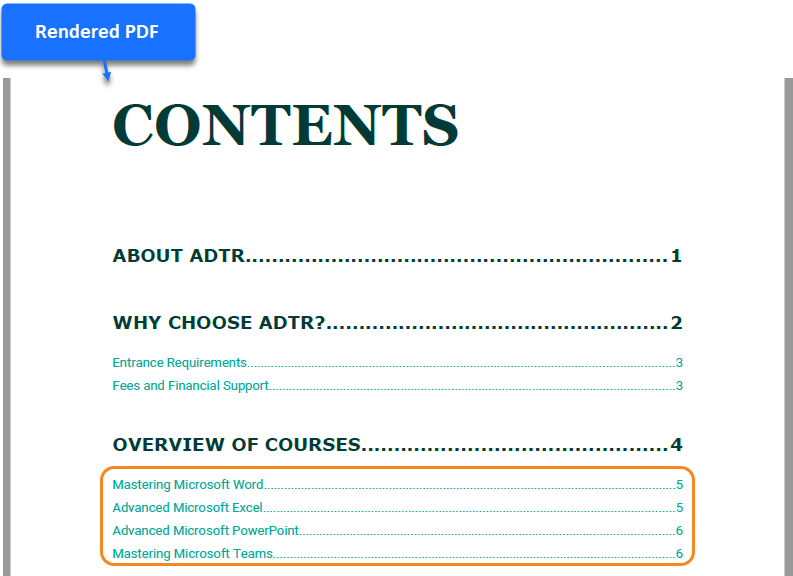
If the data provided ten courses, the Table of Contents would dynamically grow to show ten course names.
Displaying nested data
The chosenCourses array contains the information on each of the student’s chosen courses.
Each element contains inner arrays of:
- courseTopics
- startDates
- courseLecturers
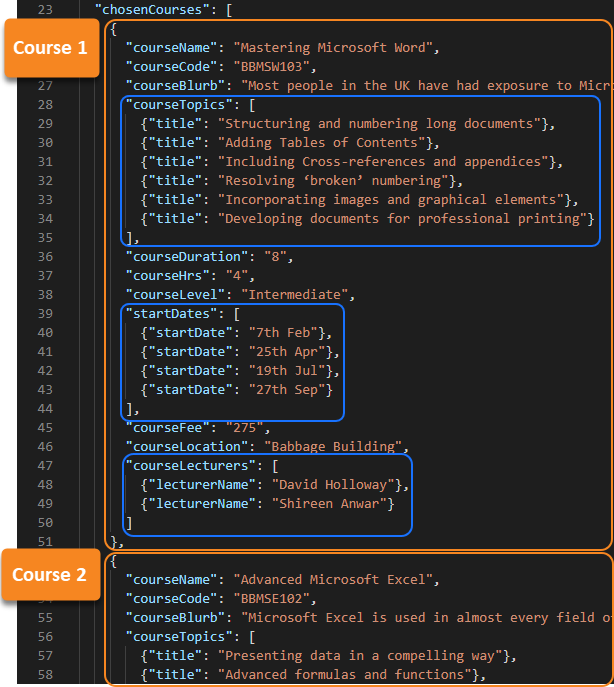
In the template, the outer <<rs_ section loops through the chosenCourses array, displaying information on each course.
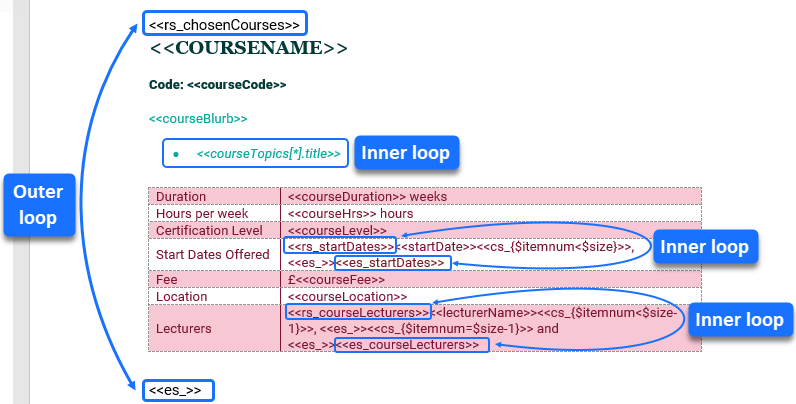
Within this loop there are three inner loops which display the courseTopics, startDates and courseLecturers, respectively.
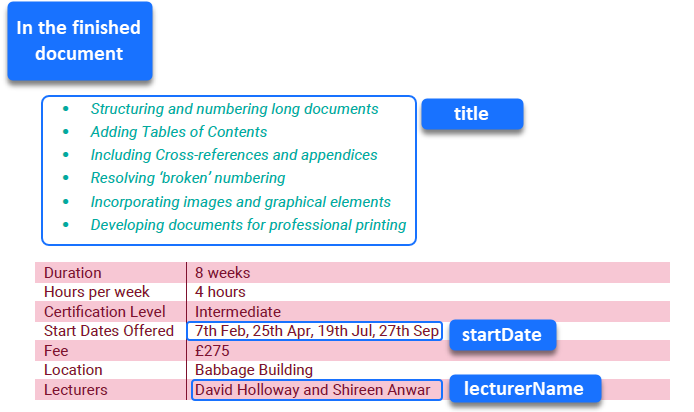
The <<courseTopics[*].title>> expression serves as a shorthand equivalent of an <<rs_ loop. When combined with a bullet list, the [*] “all” specifier instructs Docmosis to loop over and display each title as a bulleted item.
The fields between the <<rs_startDates>> and <<es_startDates>> generate the start dates as a comma separated sequence.
Similarly, the fields between the <<rs_courseLecturers>> and <<es_courseLecturers>> generate the lecturer names as a comma separated sequence with an “and” between the last two items.
For a detailed explanation on displaying comma separated sequences, see This, This and That.
Creating cover and back pages
In the template, the cover page and back page have text and merge fields superimposed over page-sized custom-designed images.
This is achieved by inserting images into the header, and then using a table in the body to position the text and merge fields.
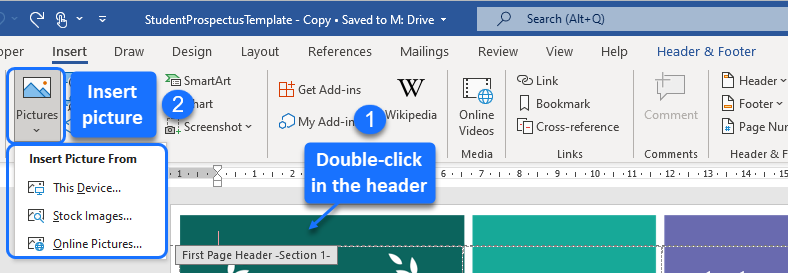
For the cover page, insert and format the images:
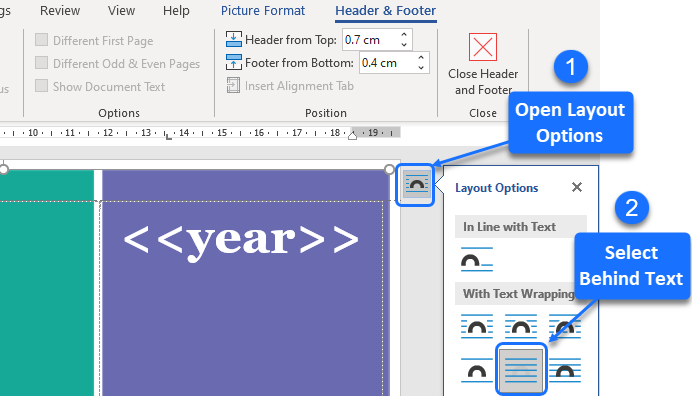
- Double-click in the header, to open the Header & Footer ribbon tab.
- Insert the page-sized image from Pictures on the Insert tab (choose from the drop-down menu to select the image).
- Open the Layout Options, and choose Behind Text.
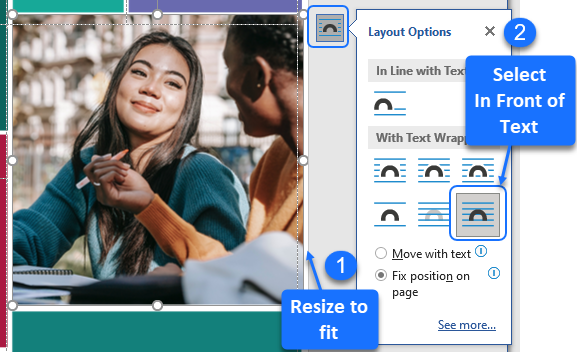
- Insert the photograph image, resize to fit the gap in the main image (select border and drag), then select In Front of Text from the Layout Options.
Next, insert a table in the body of the page.
- Close the Header & Footer tab, to return to the document body, still on the cover page.
- Insert a table in the first line: select Table from the Insert ribbon tab, and choose the rows and columns needed.
- Remove borders from the table, and select View Gridlines on the Layout ribbon tab.
- Adjust the rows and columns so that the cells are in the correct position for text placement. Merge or split cells where required.
- Insert and format the text and merge fields. Use Alignment options in the table's Layout tab to control the placement of text and merge fields.

Follow the same technique to format images and text on the back page.