


A certificate of insurance (COI) used as proof of business insurance cover.
This article discusses features that are relevant to producing certificates.
In this example, the template formats the data that will appear on the certificate.
There is provision for adding or removing different types of insurance from the final certificate.
Example in detail
This example uses if-then-else conditional logic and a range of number, date and text formatting expressions with variables. It covers the insertion of dynamic images, background watermarks and helpful table features to apply to the design of certificate templates.
Using a declarations page
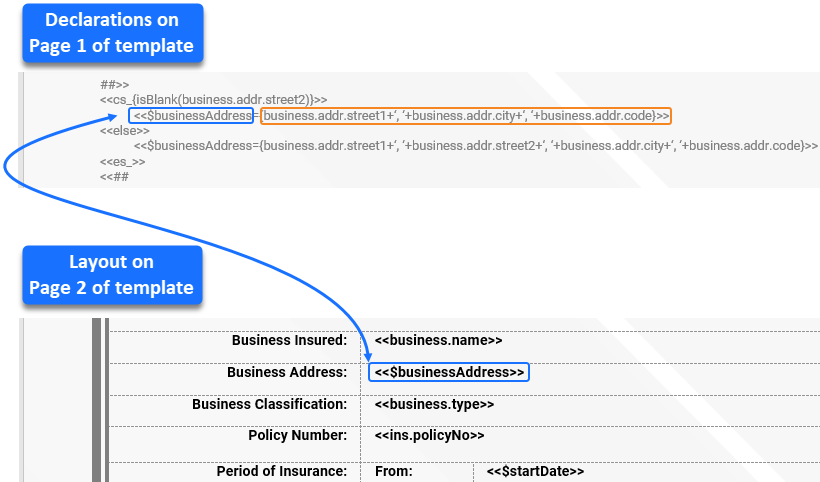
The first page of the template is dedicated to formatting the data prior to it being used on the second page. In this way, all of the formatting can be completed in one place, and the second page can focus on layout.
Variables, prefixed with the $ symbol, are created on the fly and used to store the results from formatting the data.
<<$variable={formatting expression}>>
These variables are then used on the actual certificate layout.
By way of example, the below expression uses the ‘+’ operator to join the address data into one long address line. The formatted address line is assigned to $businessAddress which is used on the certificate.
The alternative approach would be to embed the address formatting logic directly into the table cell of the certificate.
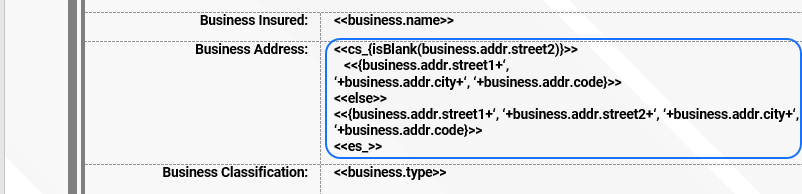
This can make it more difficult to determine the final spacing and sizing of the certificate.
For more information on working with user variables and the range of string, data and number formatting functions available, refer to the relevant Docmosis Template Guide.
Using comments
Comments are used on the declarations page to highlight the formatting that is done to the data.
Delimited by <<## and ##>> markers, the comments serve to make the template easier to read and maintain if future changes are required. The content inside these comments is "ignored" by Docmosis.

As the declarations page consists completely of comments, delimited by <<## and ##>>, and expressions, that result in no immediate output, this page is entirely removed from the rendered result.
To resolve the issue of the remaining space at the end of a declarations page:
- Use an opening <<## comment marker on the line immediately after the last expression.
- Insert a Page Break.
- Use a closing ##>> comment marker at the start of the next page.
In this way, lines can be added or deleted from the declarations page without impacting the position of the certificate on the next page.

Using if-then-else logic
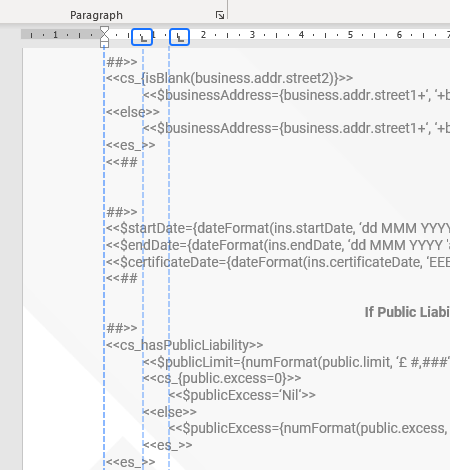
The <<cs_ and <<else statements on the first page use if-then-else logic to check various aspects of the data before formatting it for the certificate.
![]()
Tabs are used to create programmer-style indenting which serves to improve the readability of the template whilst keeping track of the nested <<cs_ statements.
For further information on the <<cs_ and <<else_ directives, see Conditional Sections and Else and Else-If.
Using the isBlank function
The isBlank function is very handy for checking whether a field is null or empty.
Here it is used to check whether the second address is blank.
![]()
For further information on the isBlank and related ifBlank functions, refer to the relevant Docmosis Template Guide.
Creating certificates using tables
A single table is used to create the layout and appearance of the certificate.
It is possible to see the entire table structure by selecting the table, then choosing View Gridlines in the Layout Ribbon.

The Table Properties together with the alignment options in the Layout tab, control the exact positioning of the fields and images used on the certificate.
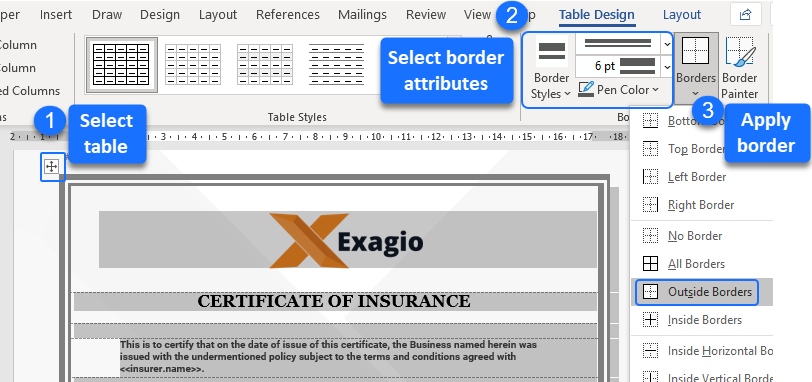
Creating a certificate border
The classic edge around the certificate is achieved by applying a thick double-lined border style to the outside border of the table.
Conditional table rows
Public and professional types of liability insurance are typically non-mandatory for business organizations.
The <<cr_ conditional row directive allows the table rows associated with these optional types of insurance to be included or removed from the certificate.
In the supplied data, the value for hasPublicLiability field is true. This means all rows between the <<cr_hasPublicLiability>> row and the <<er_hasPublicLiability>> row are included in the certificate.
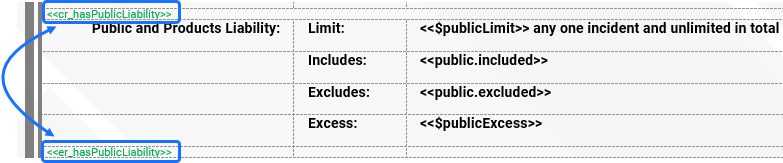
Likewise, the data value for hasProfLiability is true, so the rows relating to professional liability are included in the rendered certificate.
For more information on the <<cr_ directive, see Conditional Rows.
Creating a watermark effect
Watermarks can be useful to validate the authenticity of certificates.
Here a full page certificate watermark is achieved by using an alternative solution to Microsoft Word’s watermark feature.
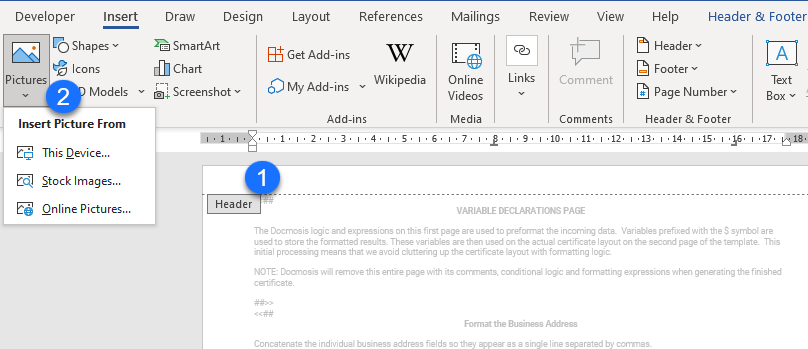
To emulate a watermark effect, a page-sized image is added to the header section of the template.
To insert the image used as a “watermark” (in Microsoft Word): Click in the Header section of the template, then click Pictures on the Insert ribbon tab, and insert a picture. In this example, a page-sized, orange “X”.png image is used.
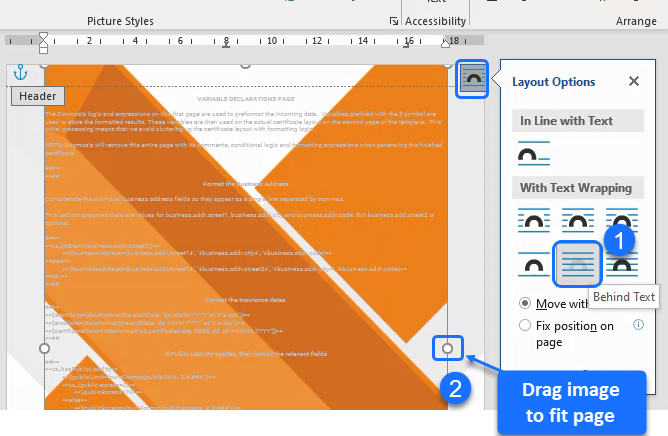
To format the image so that it appears full-page behind the certificate text in the resulting output, set the picture's Layout Options of the picture to Behind Text, then drag the sizing handles to expand the image to the page edges.
To change the color saturation, tone, transparency and recolor of the image, select the image and then click Color on the Picture Format ribbon tab. In this example, a light grey-scale version of the "X" image is selected.

Adding a signature seal stamp
A customary signature seal image is inserted dynamically into the certificate.
To understand how the placeholder image in the template uses the dynamic signature image, refer to the article Images.
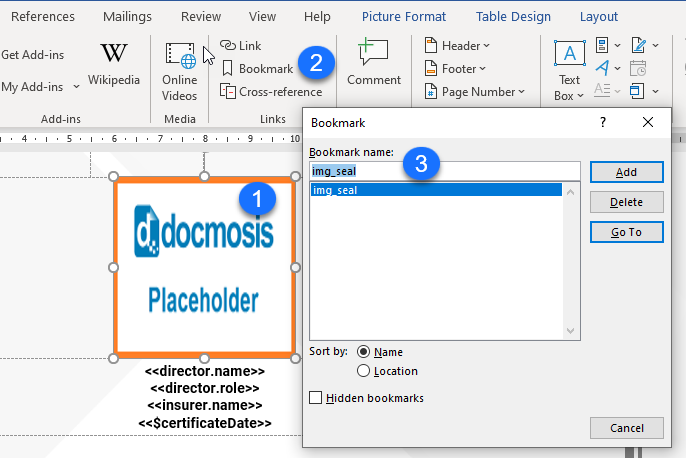
In the data file, a stock image "SignatureSeal.png" is assigned to seal, and replaces the placeholder image.
![]()
For more detail on where to store image data and how to use it, refer to the article "How to send image data or retrieve images from a file or URL".