


A Course Completion Certificate designed in a classic style.
Features in this example
This example uses table layout and design elements in the template to generate a professional-looking certificate.
The template uses a combination of personal and course data to create a unique certificate for the course participant.
The example also demonstrates the value of modifying the Hyperlink style, and how to insert a dynamic signature image.
Single set of data
The data used with this template is a single set of key/value pairs.
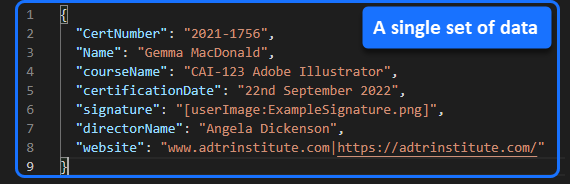
The data could come from a webform, to generate a single certificate. Or it could come from a spreadsheet or Google Sheet, to generate multiple certificates from multiple rows of certificate data.

Using a table to format the page
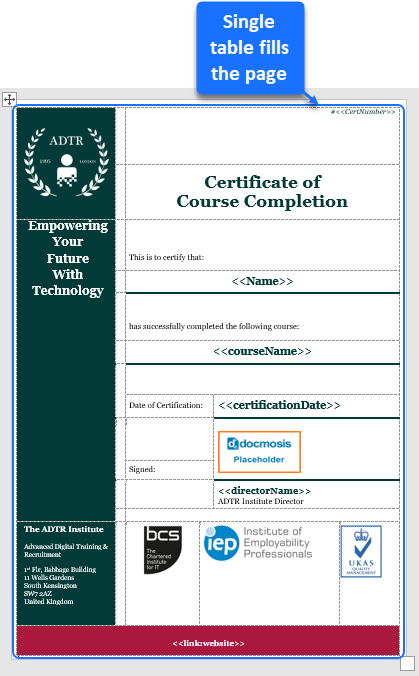
In this example, a table is used to lay out the certificate on a single page.
To lay out a page in this way:
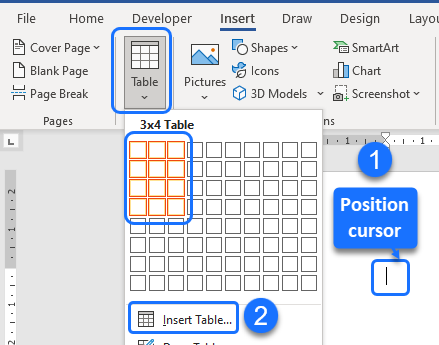
- Insert a table in the page, then stretch it to fit close to the margins.
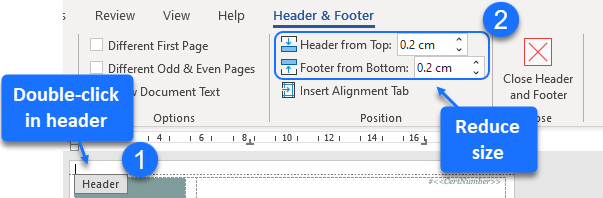
- Reduce the header and footer: double-click inside a header or footer to open the Header & Footer ribbon tab, then adjust the header and footer spacing.
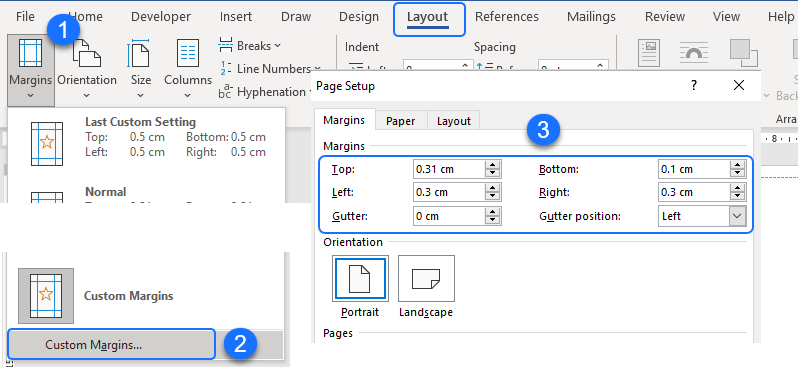
- Reduce the page margins: select Custom Margins from the Margins in the Layout ribbon tab, then reduce each margin in the Page Setup window.
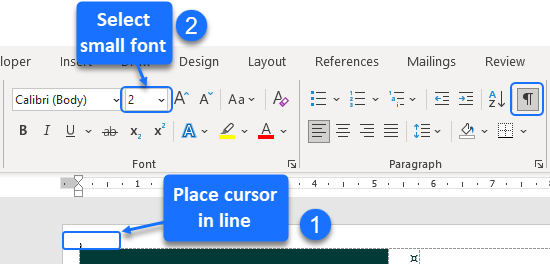
- Insert a blank line above the table (Ctrl+Shift+Enter) to make the table easier to work with in Word. Select a small font size for a small line.
- Insert another blank line directly below the table. Give this a small font size too.

Adjusting the table layout
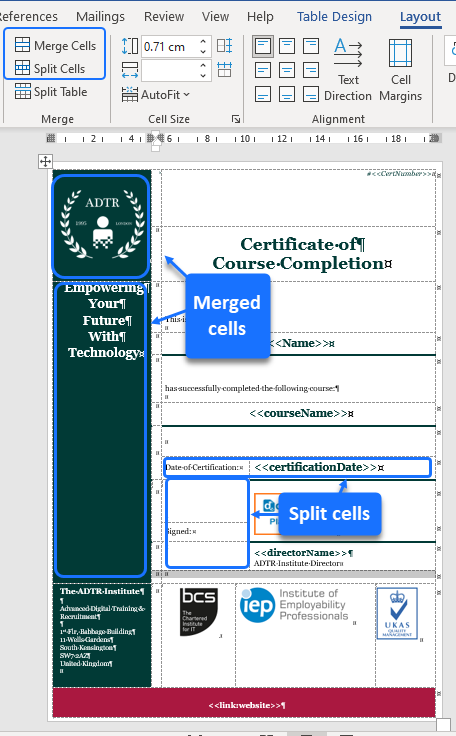
The table layout is adapted to hold the institute's motto in a left panel and a spread of accreditation logos along the bottom of the certificate. Dynamic course data dominates the center right of the table, below the certificate title.
These are the steps taken to form the table layout (add table rows and columns as necessary):
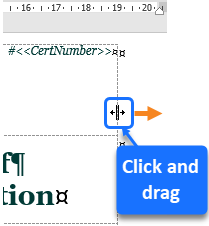
- Stretch the table to reach the narrow margins:
Click on a table border, then drag across or down.
- Merge and split cells to create the necessary areas for the desired layout:
Select a cell, then split into additional columns or rows, or select more than one cell and merge these - using Merge Cells or Split Cells on the table's Layout ribbon tab.
Tip: To view the cell outlines, Select View Gridlines on the Layout tab.
- Align each table cell to position the text, rather than using spaces and carriage returns:
Select a cell, then choose its alignment by selecting one of the alignment buttons. Alignment options are: Align Top Left, Align Top Center, Align Top Right, Align Center Left, etc.
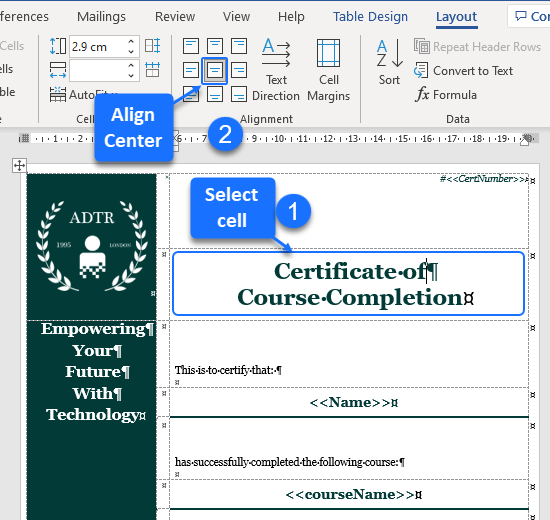
Table design options
Table design features are used to highlight key areas in this certificate.
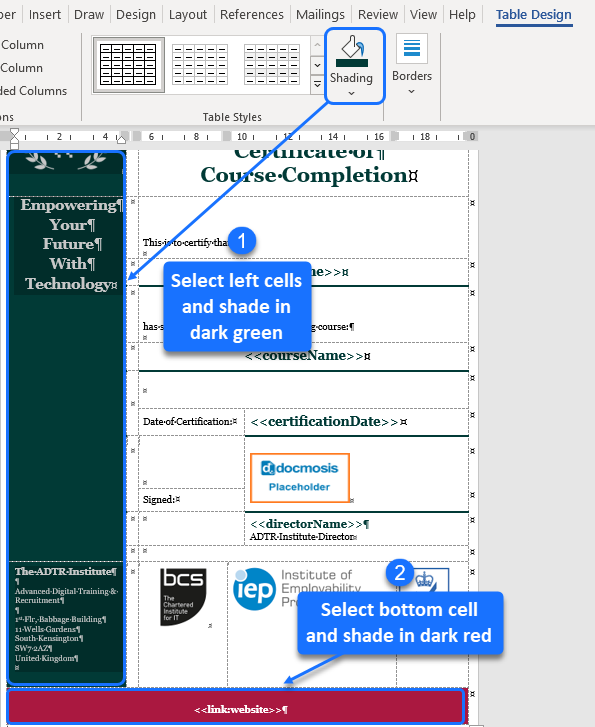
The left sidebar containing the institute's logo and address is created using cell shading in dark green, together with text in white font. The lower border is a single cell with dark red shading.
- To shade cells:
Select a group of cells to shade, then click Shading in the Table Design tab, and select a color using More Colors > Custom.
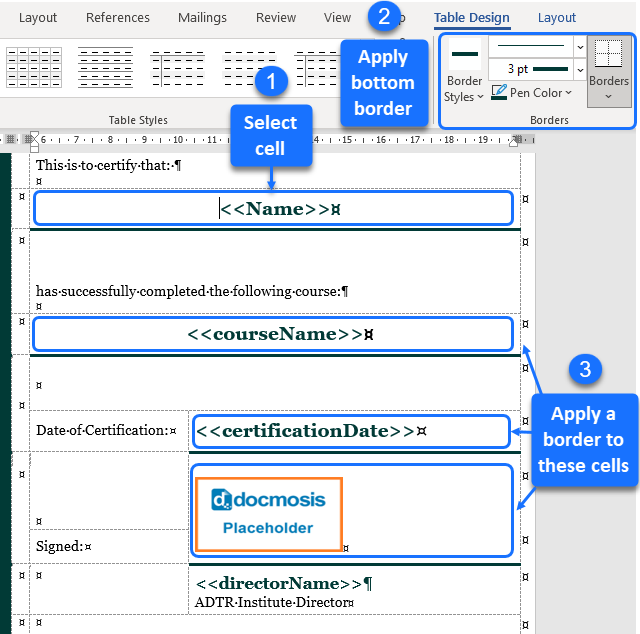
Bold cell underlining is used to make the certificate details stand out: the course and participant details, as well as the date of certification and the director's signature.
- To underline a cell:
Select the cell, then select a Line Style, Line Weight, and Pen Color, and select Bottom Border from the Borders options in the Table Design tab.
Adding a dynamic signature
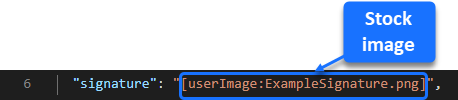
The image containing the director's signature will rarely change, and has therefore been previously stored as a stock images and referenced from there. For more detail on where to store image data and how to use it, refer to the article How to send image data or retrieve images from a file or URL.
In the data file, the stock image "ExampleSignature.png" is assigned to signature, and will replace the placeholder image when the document is generated.
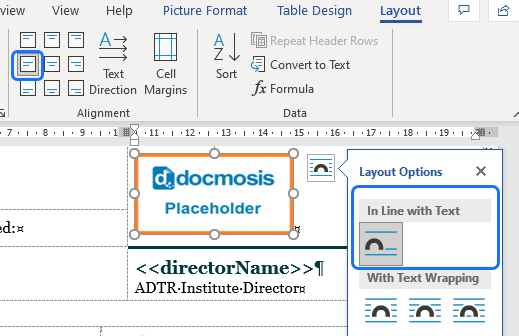
The placeholder image can be any image that has a bookmark attached to it. The bookmark is used to instruct Docmosis where to find the data for the image. To learn more about placeholder images in the template refer to the article Images.

The placeholder image is aligned Center Left within the cell, and has a layout of "In Line with Text", to keep it anchored.
Modifying the hyperlink style
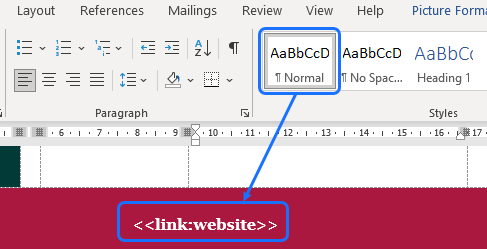
In the template, there is a placeholder in the lower border, intended for a hyperlink containing the institute's website address.
The text is in the Normal style, in a bold white font that shows up well against the red background: <<link:website>>
In order to maintain this font, the Hyperlink style in the template needs to be modified. This is because Word applies its Hyperlink style after the hyperlink data is inserted by Docmosis.
The default Word Hyperlink style is blue, underlined font.
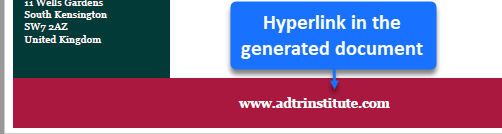
In the template, the Hyperlink style has been modified to bold white font.

In the generated document, the clickable display text is included in the certificate's lower border, in the modified bold, white Hyperlink style.
Read more about Hyperlinks.