

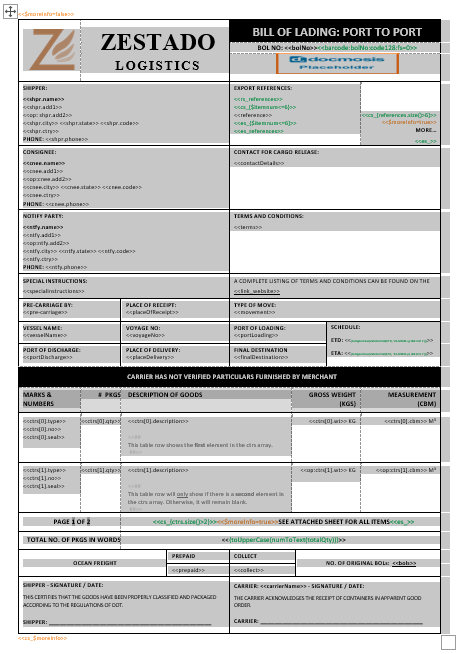
A 1-page BoL form with a supplementary listing page.
The template focuses on features that are commonly required for Bills of Lading.
This example in detail
This example allows for optional, conditional and repeating data within the designated sections of the form.
It illustrates the use of barcodes, hyperlinks, page numbering, date and text formatting functions.
Creating forms using tables
A single table is used to control the formatting, layout and appearance of this form.
Tip: To see the entire table structure, select the table, then choose View Gridlines on the Layout ribbon.
Merging and splitting cells
Merge Cells and Split Cells is used to lay out the table cells to achieve the desired form structure.
To merge table cells:
- Select the cells to be merged
- Right-click within the selected cells, then select Merge Cells from the pop-up menu.
To split table cells:
- In the table, click the cell that you want to split.
- Right-click, then select Split Cells from the pop-up menu.
- In the Split Cells dialog box, select the number of columns and rows required, then click OK.
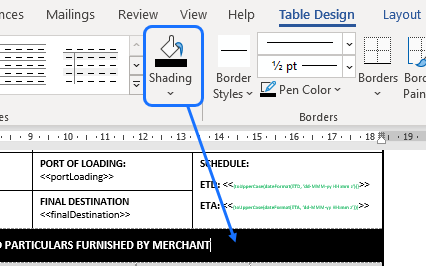
Table borders and shading
Table Borders are used to delineate the different sections of the form. A thicker line with a 1 ½ pt weight is applied around the major sections and the outside of the form.
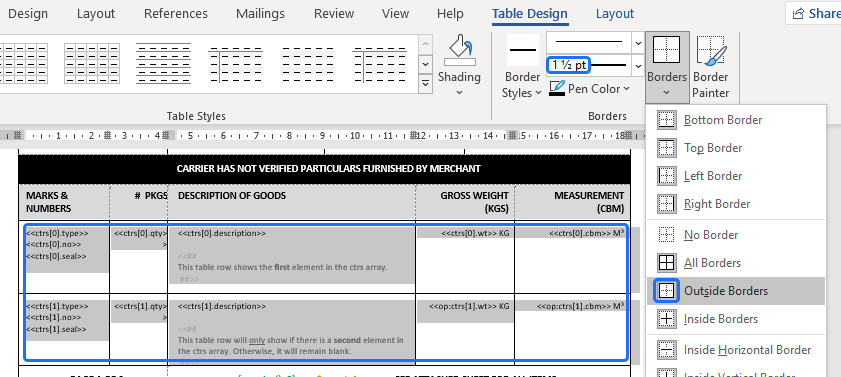
Table cell shading is used to highlight key sections of the form.
Freezing the table layout
As the table is being used to create a fixed-size form, it is important that the table layout does not expand once it is filled with data.
To “freeze” a table layout:
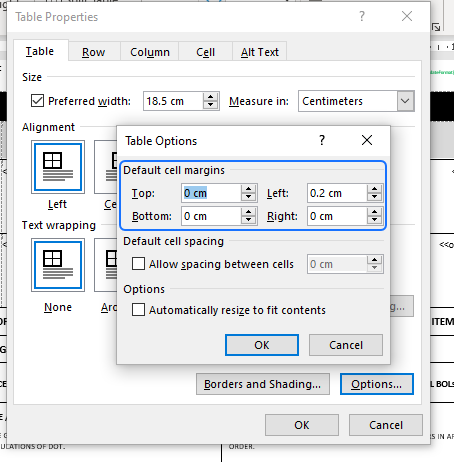
Clear the Automatically resize to fit contents check box in the Table Options dialog box.
![]()
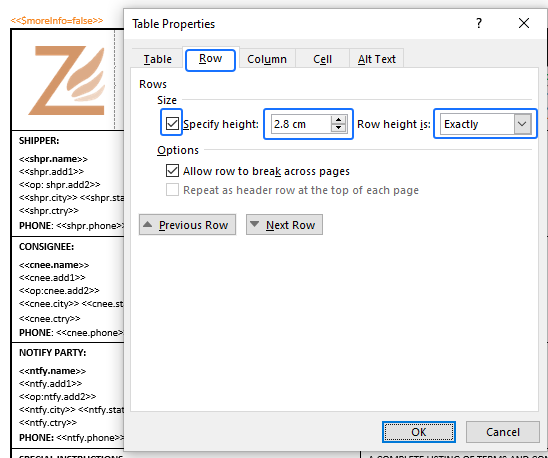
Specify the exact height of each table row.
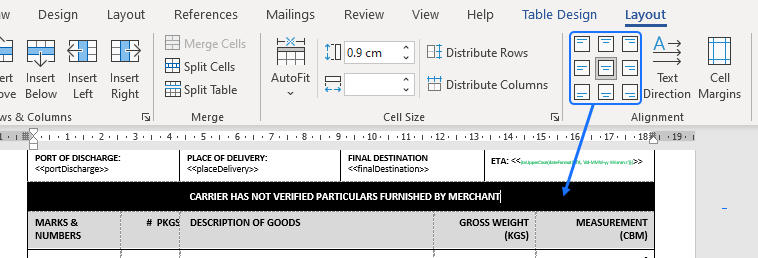
The text and data are positioned in the individual table cells by setting alignment options and cell margins.
To change the text alignment in a cell: select the cell, then click on an Alignment option in the Layout tab on the ribbon.
The default margin settings are set from the Table Options dialog box.
To set margins for individual cells, update the Cell margins in the Cell Options box.
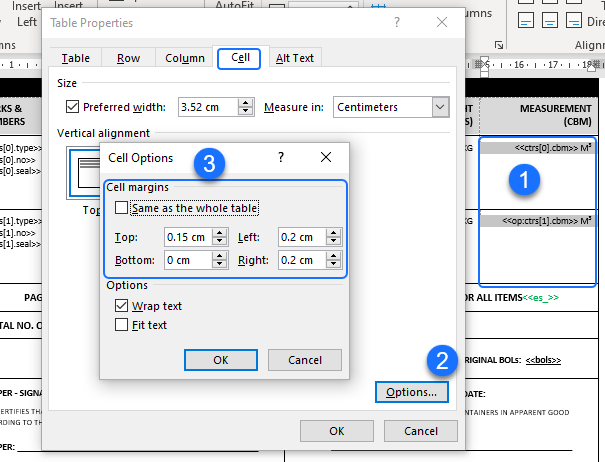
Note: When table rows are set to an exact height, it is good practice to only specify the top, left and right cell margins.
Using <<cs_ and $itemnum to limit repeating data
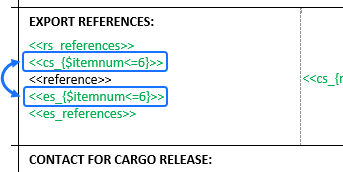
The template uses a <<cs_ conditional section to set a limit of 6 to the number of items shown in the EXPORT REFERENCES box, using the directive <<cs_{$itemnum<=6}>>.
Docmosis has a built-in variable, $itemnum, which is used inside a repeating section. Its value starts at 1, and increments by 1 each time the data is repeated.
Here, $itemnum is used inside the <<rs_references>> repeating section. The condition is that $itemnum<=6. Thus, only the first 6 occurrences of the <<reference>> element are displayed.
For general information on using the <<cs_ directive, see Conditional Sections.
Referring to array elements by index
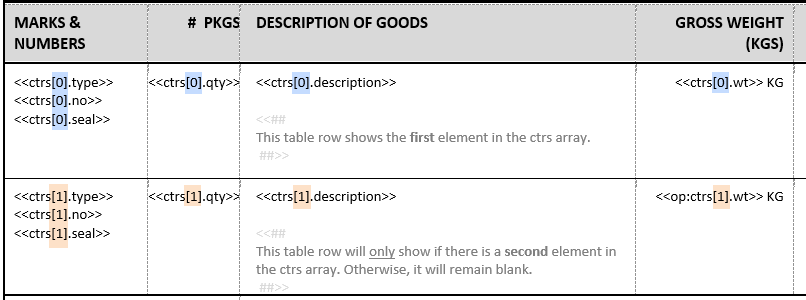
This Bill of Lading form only has space to show information on the first two container loads of goods.
By using the square bracket [ ] index notation, the template explicitly refers to the first two elements in the ctrs array.
Note that the array index starts at 0. So <<ctrs[0].___>> shows the details of the first element and <<ctrs[1].___>> shows the second element.
If there is only one element in the ctrs array the <<ctrs[1].___>> items will conveniently remain blank.
Conditional pages
The template is designed to show a supplementary listing page when there is too much data to fit on the Bill of Lading form.
This is achieved by declaring a variable $moreInfo with an initial false value at the start of the template.

In the relevant sections, there are checks to see whether the total number of elements in either the references array or the ctrs array exceeds what can fit within the allocated spaces on the form. These checks use the Docmosis built-in size variable.
Example: ThisArray.size() returns the total number of elements in the array called ThisArray.
If there are more than 6 elements in the references array or more than 2 elements in the ctrs array, the $moreInfo variable is set to true.


At the end of the first page, the <<cs_$moreInfo>> directive is used to control whether the supplementary listing page is displayed.
The Page Break inserted after the <<cs_ directive ensures that the supplementary listing starts on a new page.
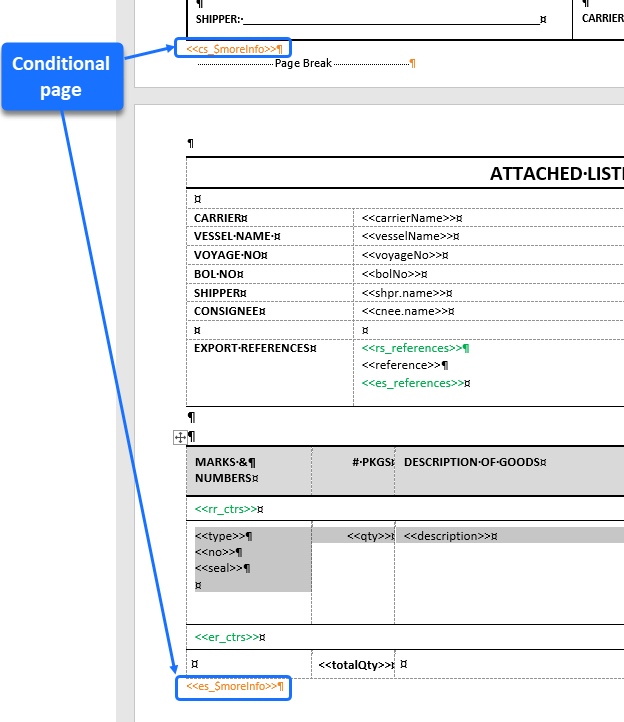
The second page provides a complete listing of all the elements in both the references and the ctrs arrays by using the <<rs_ repeating section and <<rr_ repeating rows directives respectively.
For further information on using these repeating directives, see Repeating Sections and Tables.
Using op: for optional data
This template shows the versatility of the op: optional paragraph feature.
In the first instance, op: is used with the extra address lines in the Shipper, Consignee and Notify Party sections of the form.
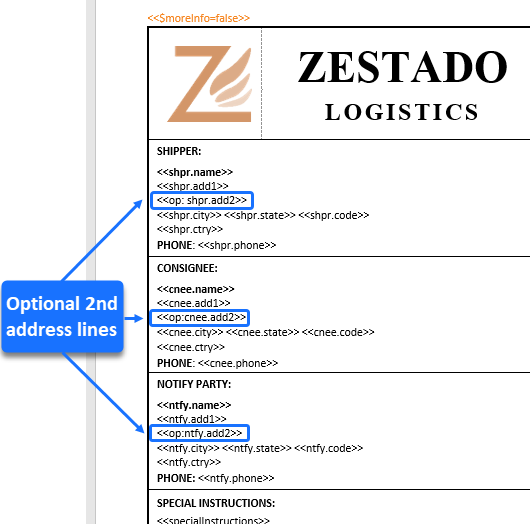
For each of the address blocks: if the second address line is blank, the line is excluded from the output and the address information underneath is moved up so there are no unwanted blank lines appearing in that block.
An added benefit of the op: feature is shown in its use here:
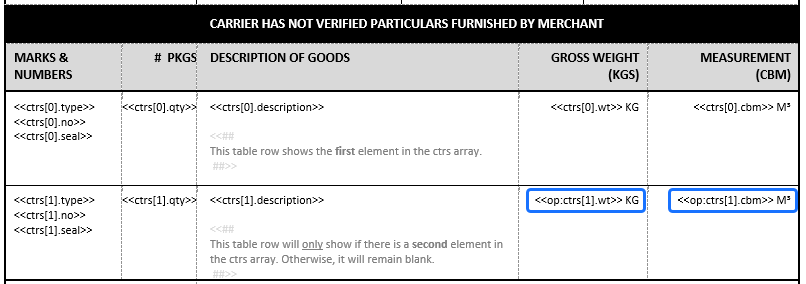
In the instance where there is no second element in the ctrs array, there will be no value for either ctrs[1].wt or ctrs[1].cbm.
When op: is used with a field that is blank, the entire paragraph is removed, including any other content in the paragraph.
By using op: with these merge fields, the additional text for the measurement units “KG” and “M³” will also be removed.
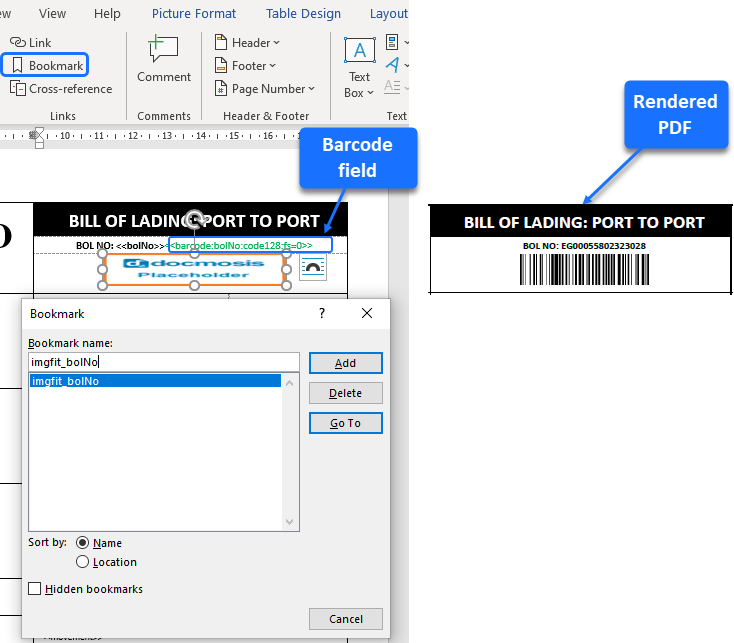
Barcode generation
QR codes and barcodes are frequently used on Bills of Lading to make it easier to verify the information online.
In this example, a barcode is generated in Code 128 format from bolNo, which is sourced from the data.

- A placeholder image in the template marks the size and position of the barcode.
- A bookmark identifies the data, being bolNo, to use for the value of the barcode.
- A “barcode field” defines the attributes for the barcode.
For an explanation on how to insert barcodes with different formats and attributes, see Barcodes.
Nested functions
Docmosis provides a range of string, date and number functions to format data.
This template shows how it is possible to nest functions to achieve the desired formatting.
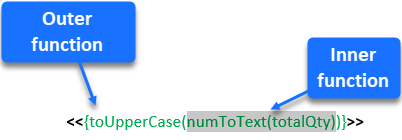
In this example, the inner function, numToText , converts the totalQty of 580 to words.
The result, Five Hundred and Eighty, is passed to the outer function, toUpperCase.
The toUpperCase function returns the string using all uppercase characters. The result is FIVE HUNDRED AND EIGHTY.
For information on all the functions available, refer to the relevant Docmosis Template Guide.
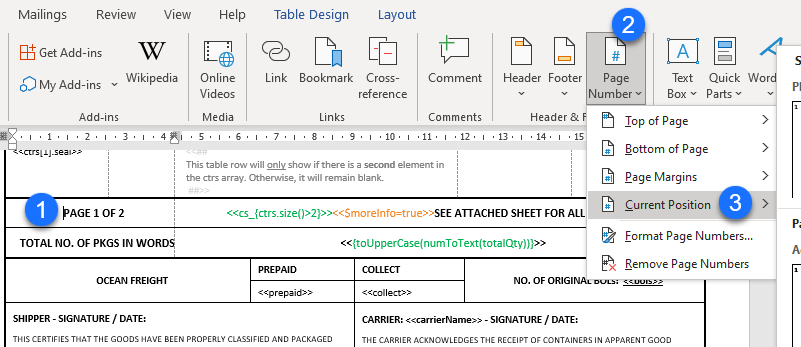
Page numbering
Page numbering is not restricted to the header or footer region of documents. For Bills of Lading, it is often shown in the central section of the form.
To insert a page number in a selected position (in Microsoft Word):
- Click on the selected position.
- Click the Page Number button on the Insert tab on the ribbon.
- Select Current Position from the drop-down menu, then select the page number style from the drop-down list (Page X of Y was selected for this template).
Hyperlinks
This example uses the Docmosis link feature to insert a hyperlink into the form.

In the data file the hyperlink display name and the link URL, separated by a pipe | symbol, are assigned to website.
![]()
For further information on adding hyperlinks, see Hyperlinks.
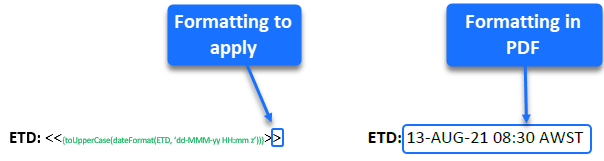
Formatting of fields
In Docmosis, the formatting used on the second closed angled bracket > of a field is the formatting that is applied to the output.
This provides flexibility to change the formatting of the inner portion of fields to improve template readability.
In the example below, the logic portion uses green text, for emphasis, and its small font means it fits within the cell. The final > bracket is formatted using a larger font in black (and thus the output is formatted in the larger black font).