
Claris FileMaker (https://www.claris.com) lets you build custom apps to solve business challenges.
This article explains how to generate a document from a FileMaker application using Docmosis.
A big thank you to FileMaker guru Greg Hains @ Divide By Zero (https://www.dbz.net.au) who created the basis for this example and allowed us to share it.
Overview
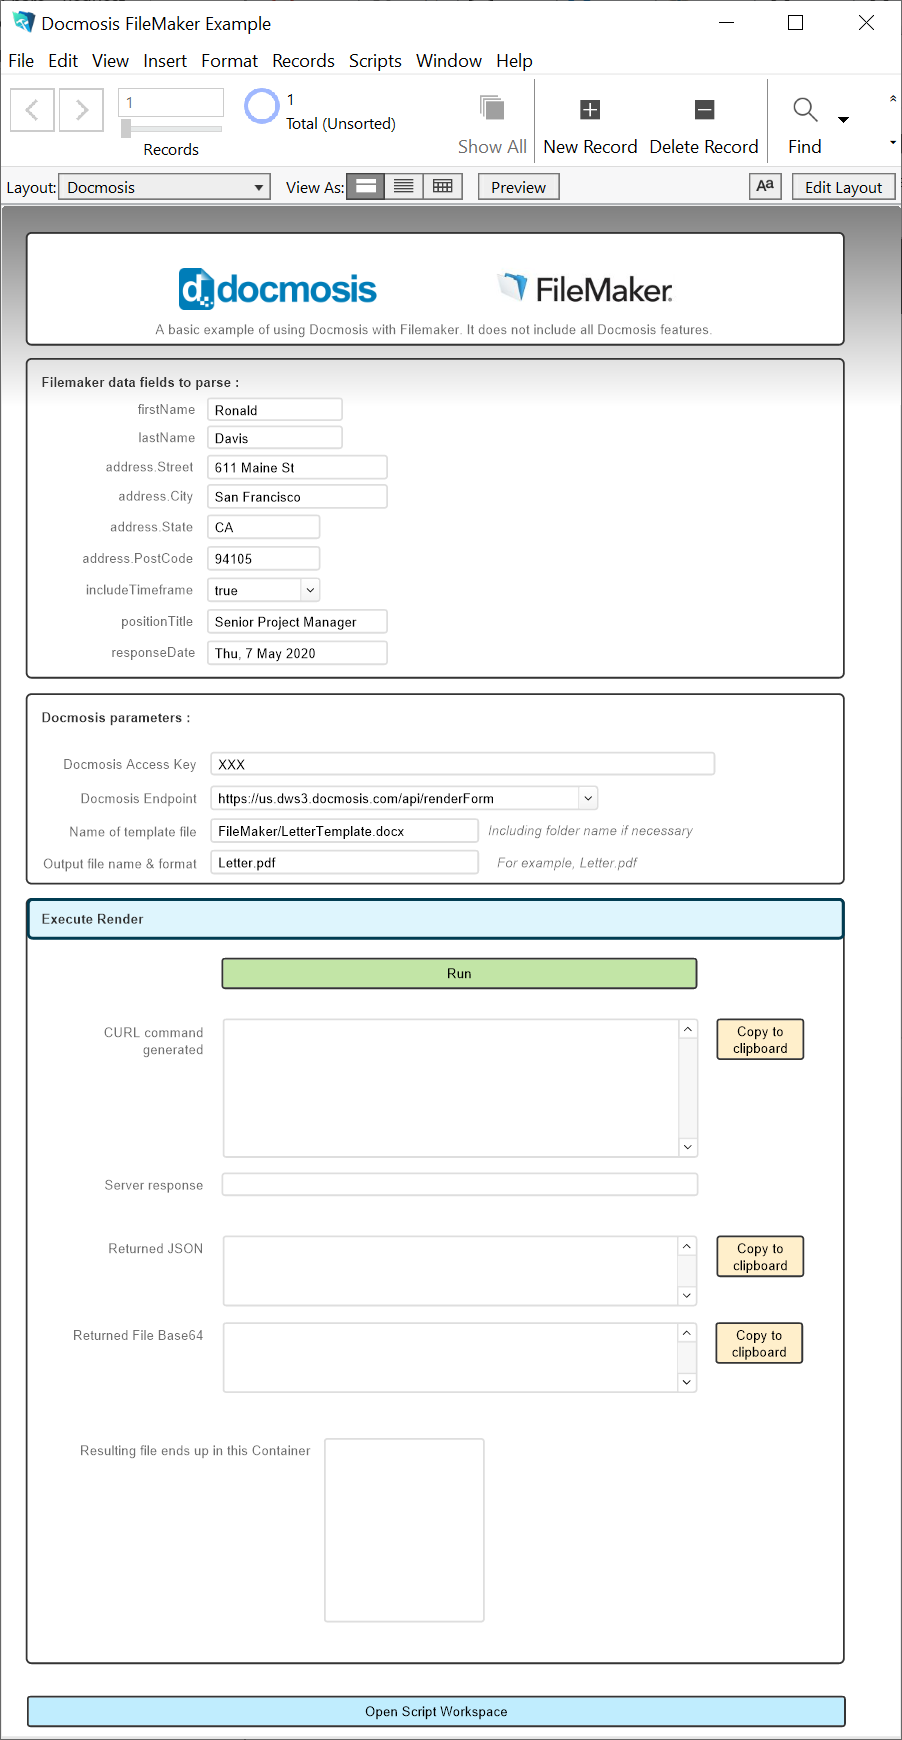
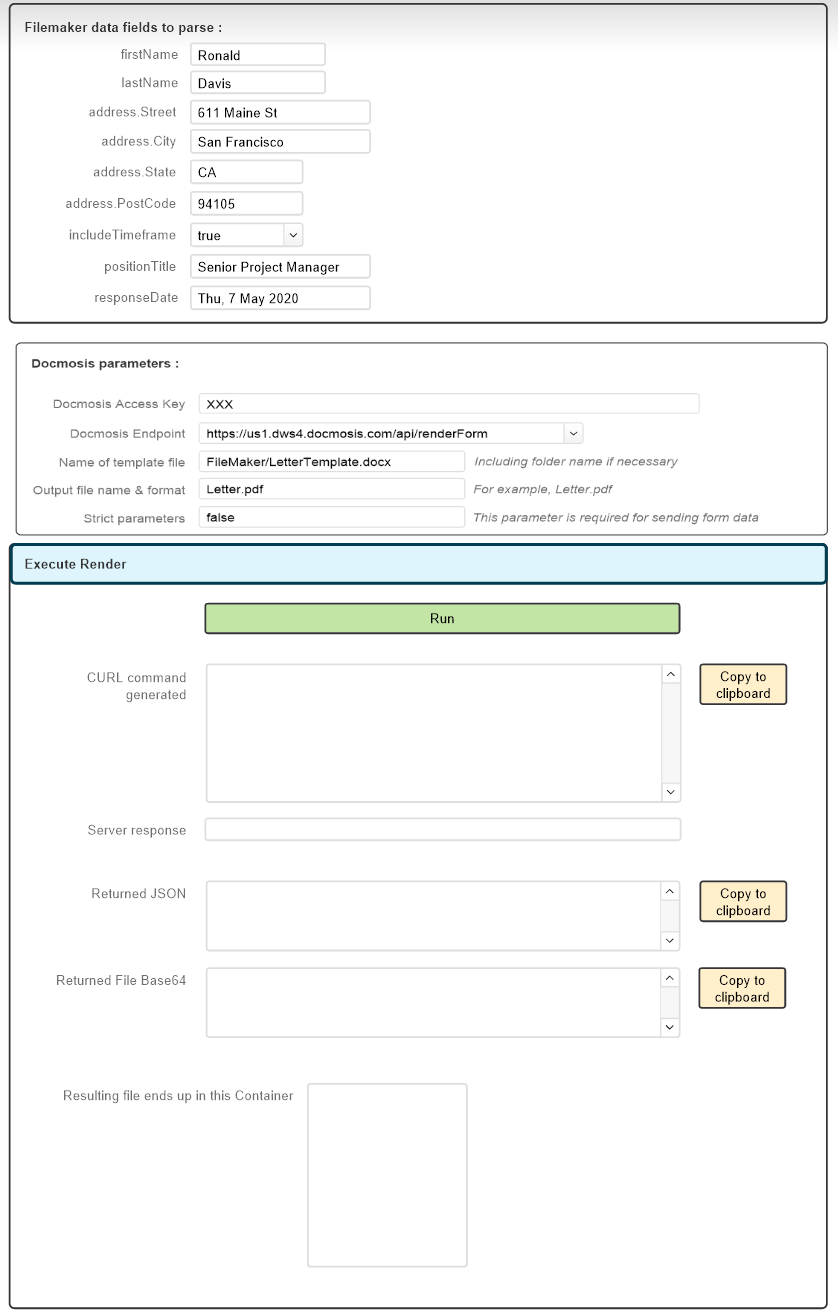
In this example we create a simple app with a form, using FileMaker, to collect data and initiate document generation. We will use the Docmosis Cloud API to generate a PDF letter. The letter will be based on a Microsoft Word template stored in your Docmosis Cloud account.
When the form is submitted the data from the form will be sent to Docmosis Cloud API and merged with the template to create the PDF.
The generated PDF letter will be saved in the FileMaker database and displayed on the form.
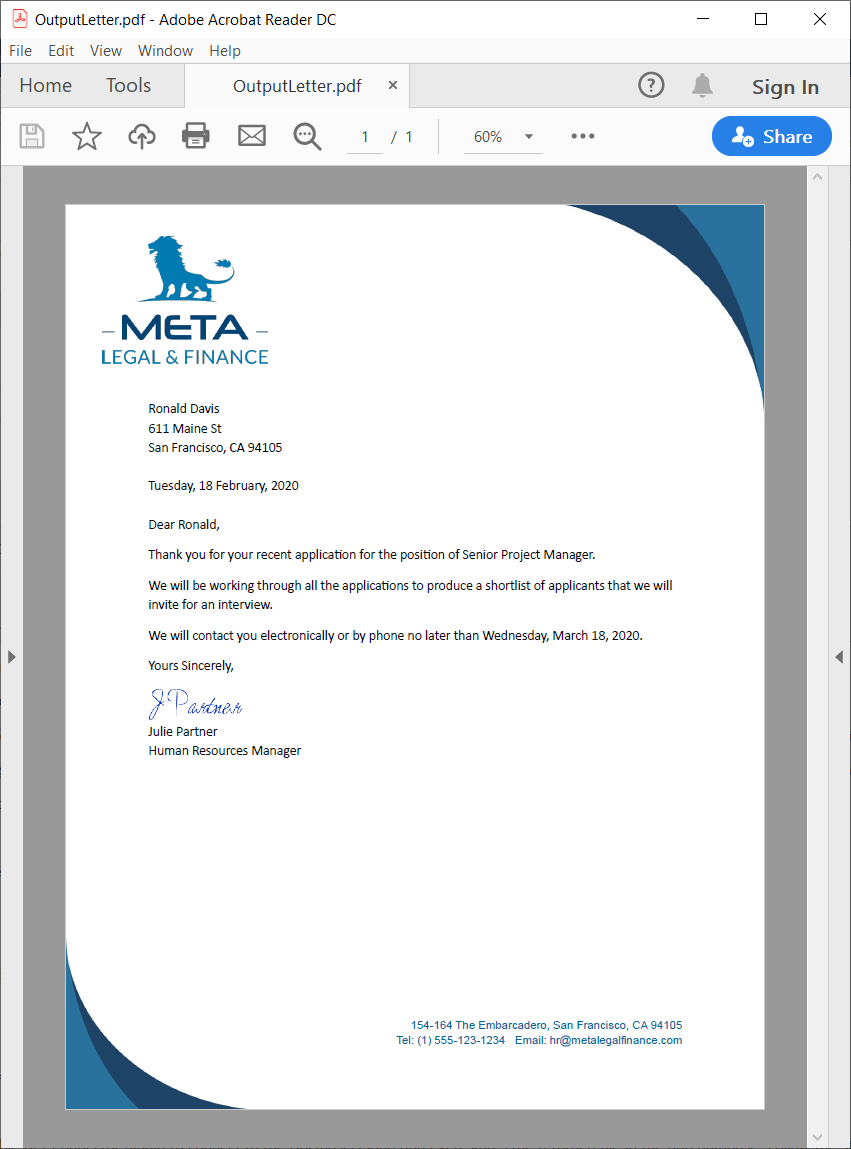
We've included the finished application and example output below in case you want to jump straight to the results:
This example can be modified to generate documents based on different templates (invoices / letters etc) and in different formats PDF/Docx/ODT/TXT. You could also use any data stored in your FileMaker application and use any action to trigger the generation of the document.
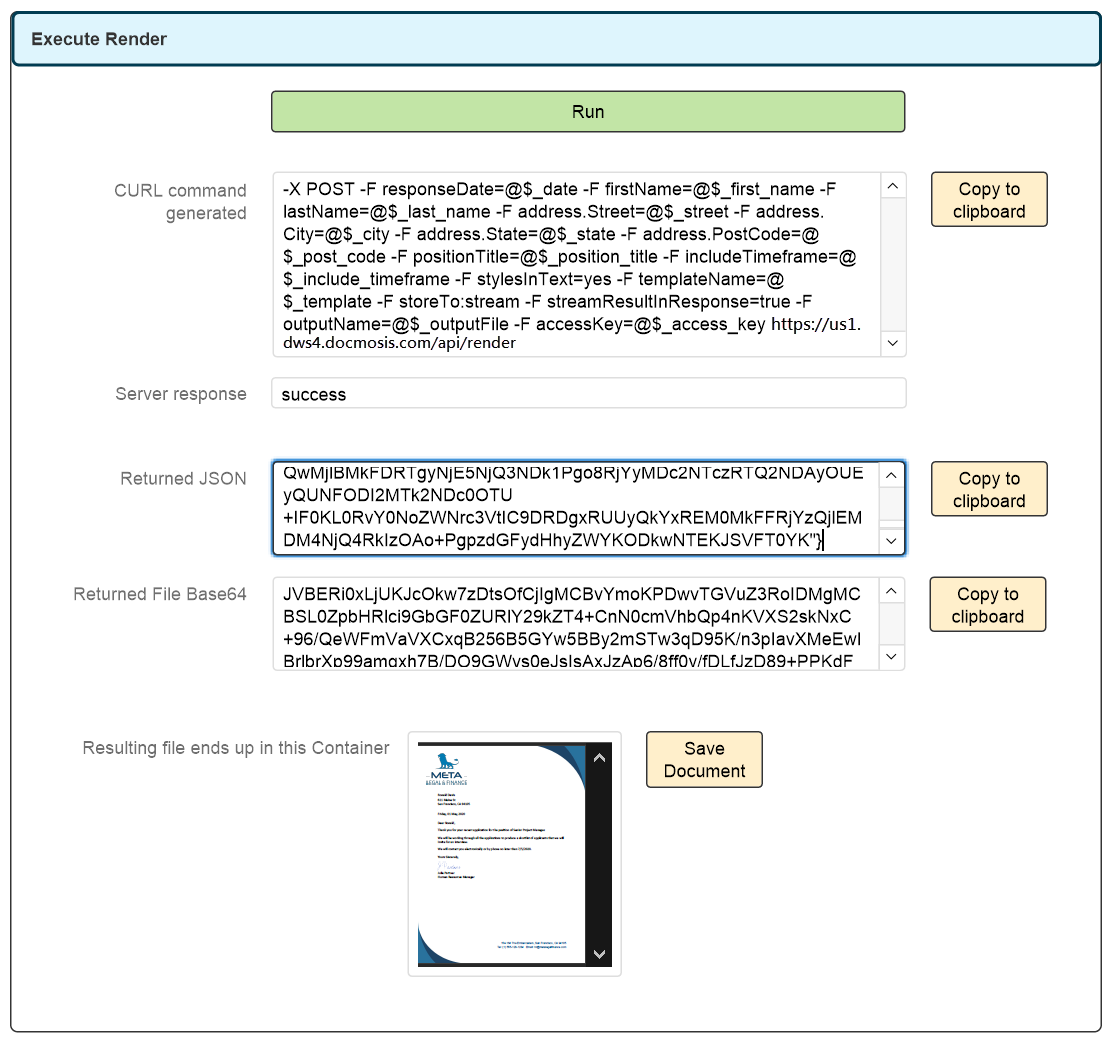
Note: This example contains extra fields below the "Run" button to highlight what is happening "behind the scenes". These fields would be removed in a finished app.
You will need
FileMaker Pro
Obviously, there is a lot to learn about FileMaker. Follow their sign-up process and tutorials to get you started.
Create a new FileMaker app or start work with an existing one.
If you are already familiar with FileMaker you can jump into our provided FileMaker file. Start with the Database and Form to see the required fields to generate the Letter Template. In the Scripts Workspace you can see how the curl call is created and executed.
Docmosis Cloud Account
If you don't already have a Docmosis Cloud account, you can start a free trial here.
Once you have an account you should login to the Docmosis Cloud Console.
Note: In this example we are using the US region for storing templates and generating the document, but you could choose EU or AU as required.
Let's Get Started
Step 1: Upload the Template to your Docmosis Cloud Account
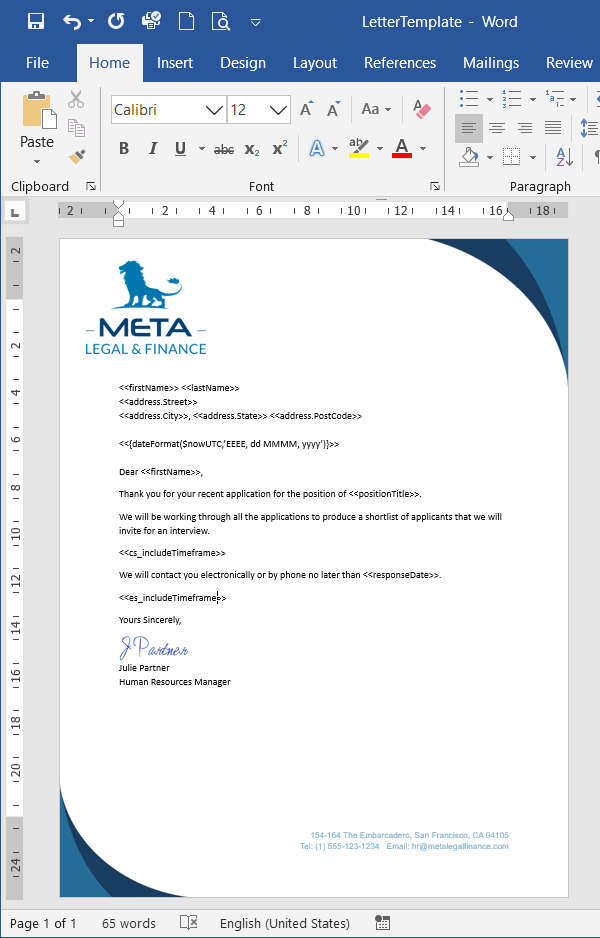
1.A) Download this sample Microsoft Word template using the link below.
Note: If you open the template in Microsoft Word you will see the fields that Docmosis will replace with data. They look like this: <<firstName>>.
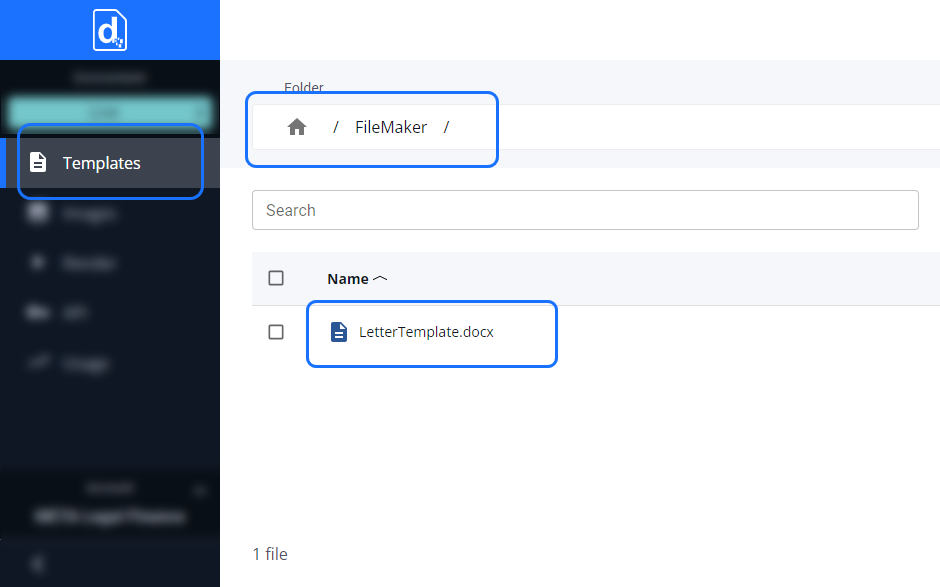
1.B) In your Docmosis Cloud Environment, create a top-level folder called "FileMaker". This allows us to keep the FileMaker templates separate from other work we might be doing in the Docmosis cloud environment.
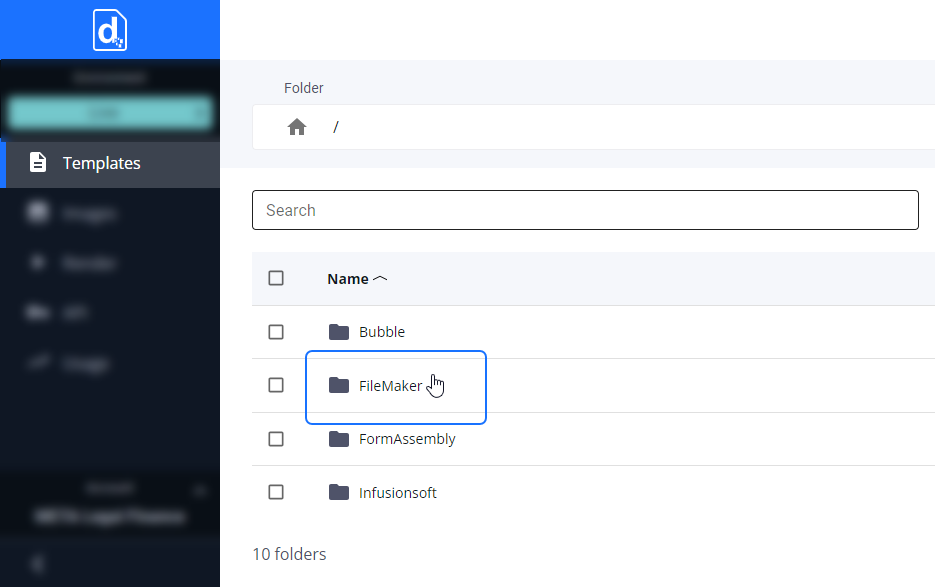
1.C) Upload the template we downloaded in step 1.A) to the FileMaker folder in your Cloud.
Step 2: Locate your Docmosis Cloud API access key and URL
Find your access key and URL as you will need them, when setting up the call to Docmosis cloud API in your FileMaker application.
Step 3: Configure your FileMaker app to collect the data
Note: If you are new to FileMaker please consult their extensive tutorials for assistance in creating and laying out forms.
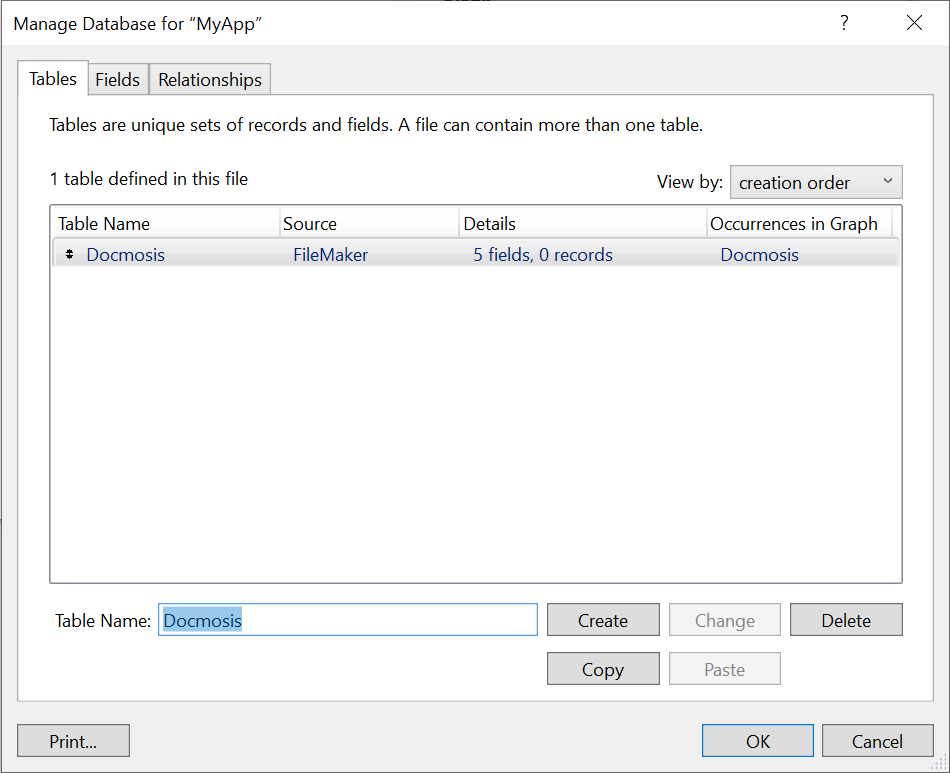
3.A) Using the Database Dialog Box (File -> Manage -> Database), Select or Create a New Table to store the data.
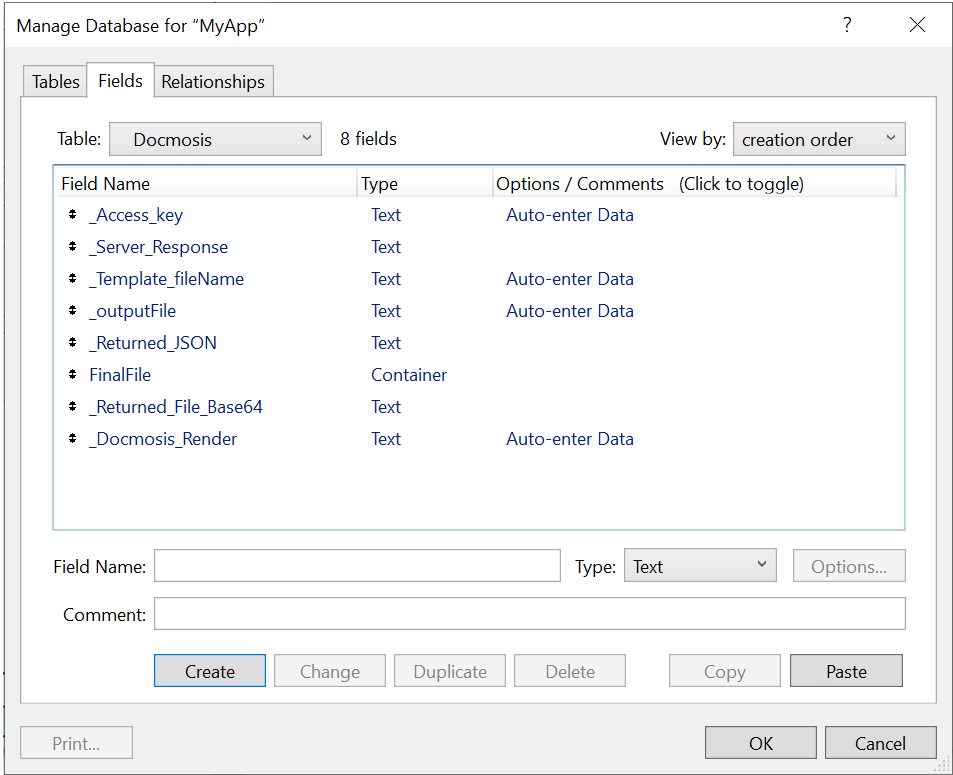
3.B) In the fields Tab add:
- All the required fields to call Docmosis:
- Access Key
- Base URL and Endpoint (eg https://us.dws3.docmosis.com/api/render)
- Template Name
- Output name and format
- A field to store the Server Response Result (Success or Failure)
- A field to store the returned Json response
- A field to store the Base64 text.
- A Container field to store the returned File
Note: In our Example FileMaker app we have an additional _CURL_created field to store the generated curl call. This is optional and used for troubleshooting.
Note: The _Docmosis_Render and _Access_key fields are optional and can instead be put directly into the curl call. Just be careful not to expose your Access key to unauthorized persons!
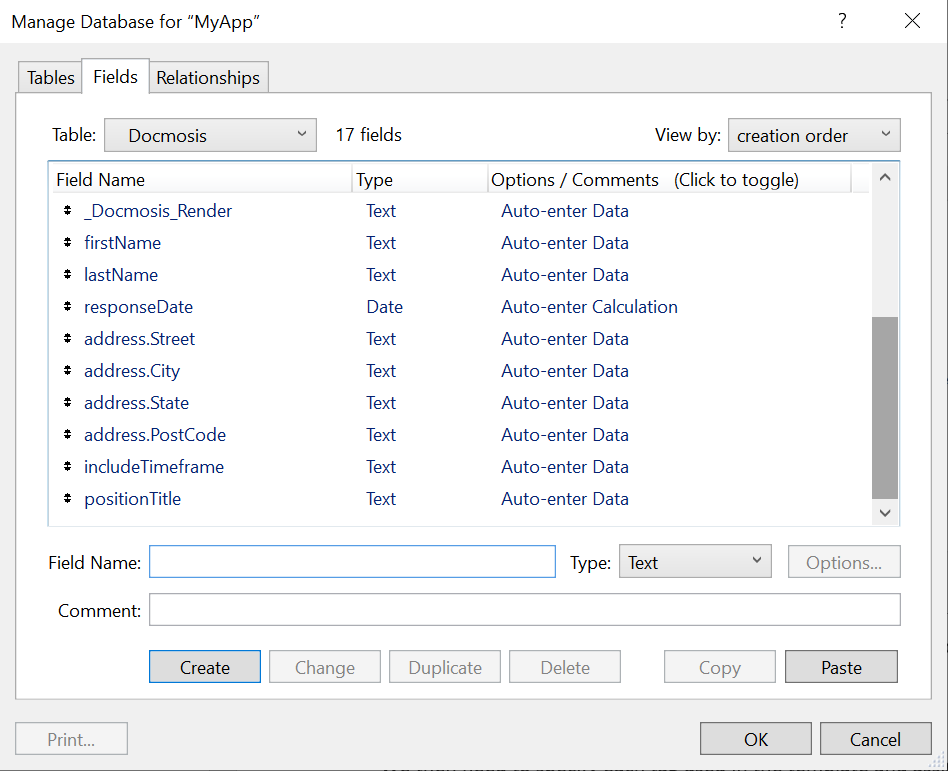
3.C) Now you should add more fields - one for each field in the template.
For example, for the <<firstName>> field in the LetterTemplate.docx there should be a matching field in the database which will in turn be used as part of the call to Docmosis.
3.D) Next step is to add controls to your form that can be used to capture all of the data required to call the Docmosis Render endpoint and to display the response. These controls will match the fields in the database.
Note: For the includeTimeframe and Docmosis Endpoint Fields we have used a dropdown that sources data from a Value List. To create a Value List click File -> Manage -> Value Lists.
Step 4: Create a script to execute the render
4.A) Using the Script Workspace (File -> Manage -> Scripts), Create a new Script which will be used to execute the Docmosis Render
4.B) In your new script set a variable for the Docmosis Access key, Template, Output file, Base URL and every field in your template:
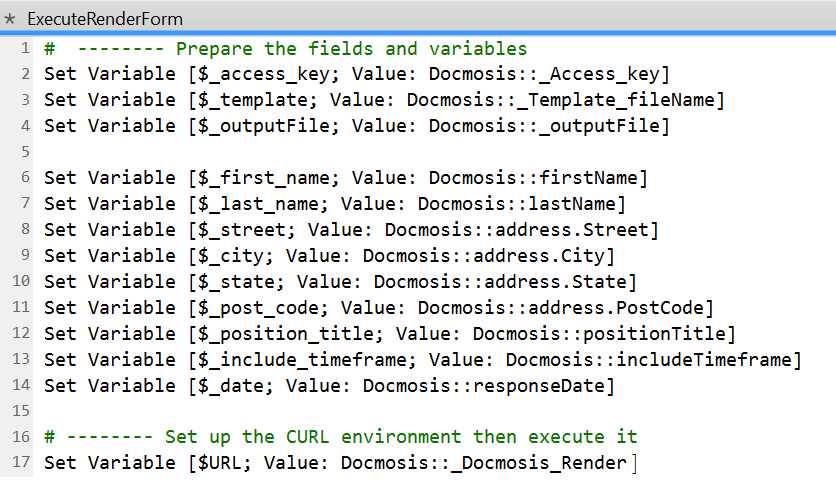
Note: The Base URL and Access key fields can be directly added here instead of using a variable in your database and form.
4.C) Next, we create the curl command, which will be used to execute the render request with Docmosis. First add a new “Set Variable” function and then open the dialog box and give the variable a name:
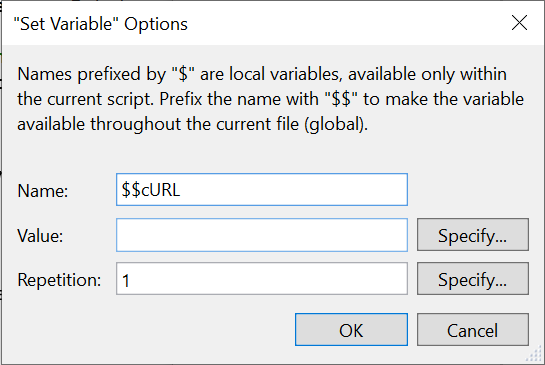
Next open the Specify Value Dialog. We use this to build the curl string:
Rendering a Docmosis template involves sending (or POSTING) data to the Docmosis Endpoint. So we first tell curl we are using a post request with:
“-X POST”
We then need to specify each tag used in the template and assign it the corresponding variable we set up in 4.B. So for first name, the tag in the template will look like this: <<firstName>> and the variable we created previously is $_first_name which in turn is linked to the firstName field in the database. So to add this to the curl command we use:
“ -F firstname=@$_firstName”
Similarly, we add the Accesskey, templateName and outputName required parameters.
We also add the following:
“-F storeTo:stream” &
“-F streamResultInResponse=true”
This tells Docmosis to send the result back to FileMaker in Base64 format. We will process this in later steps.
Lastly we add the url variable we set up previously, $URL, to the end of the curl command.
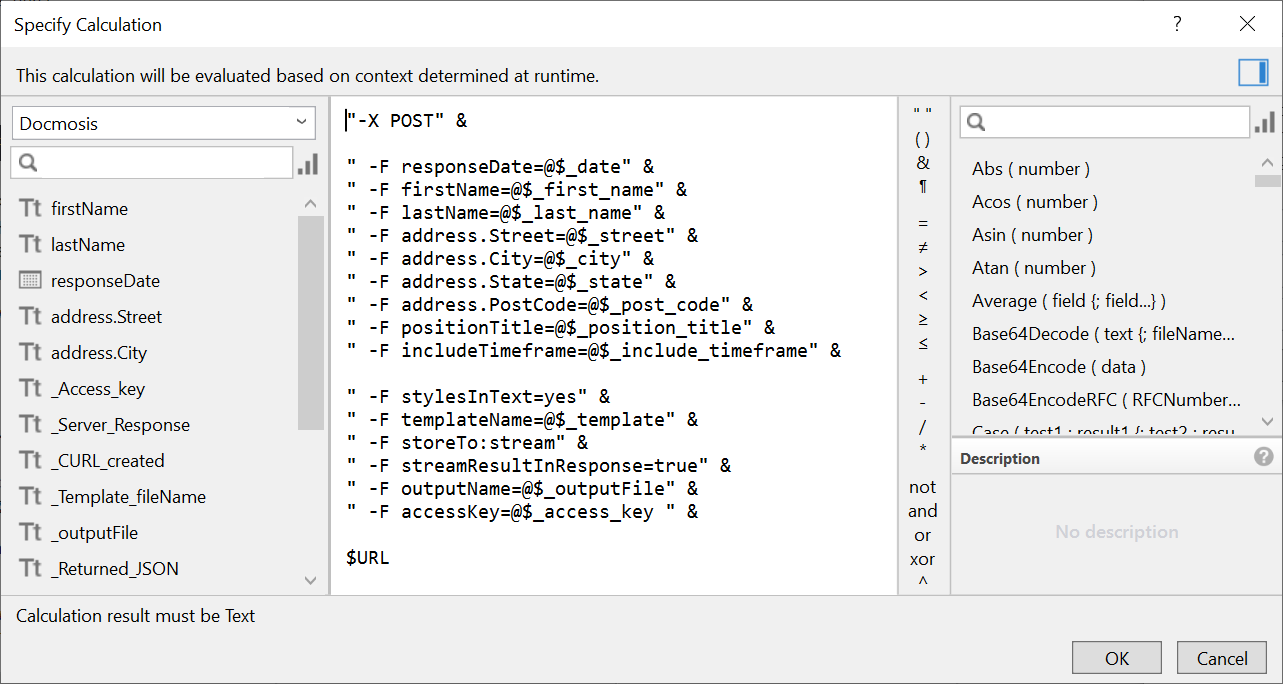
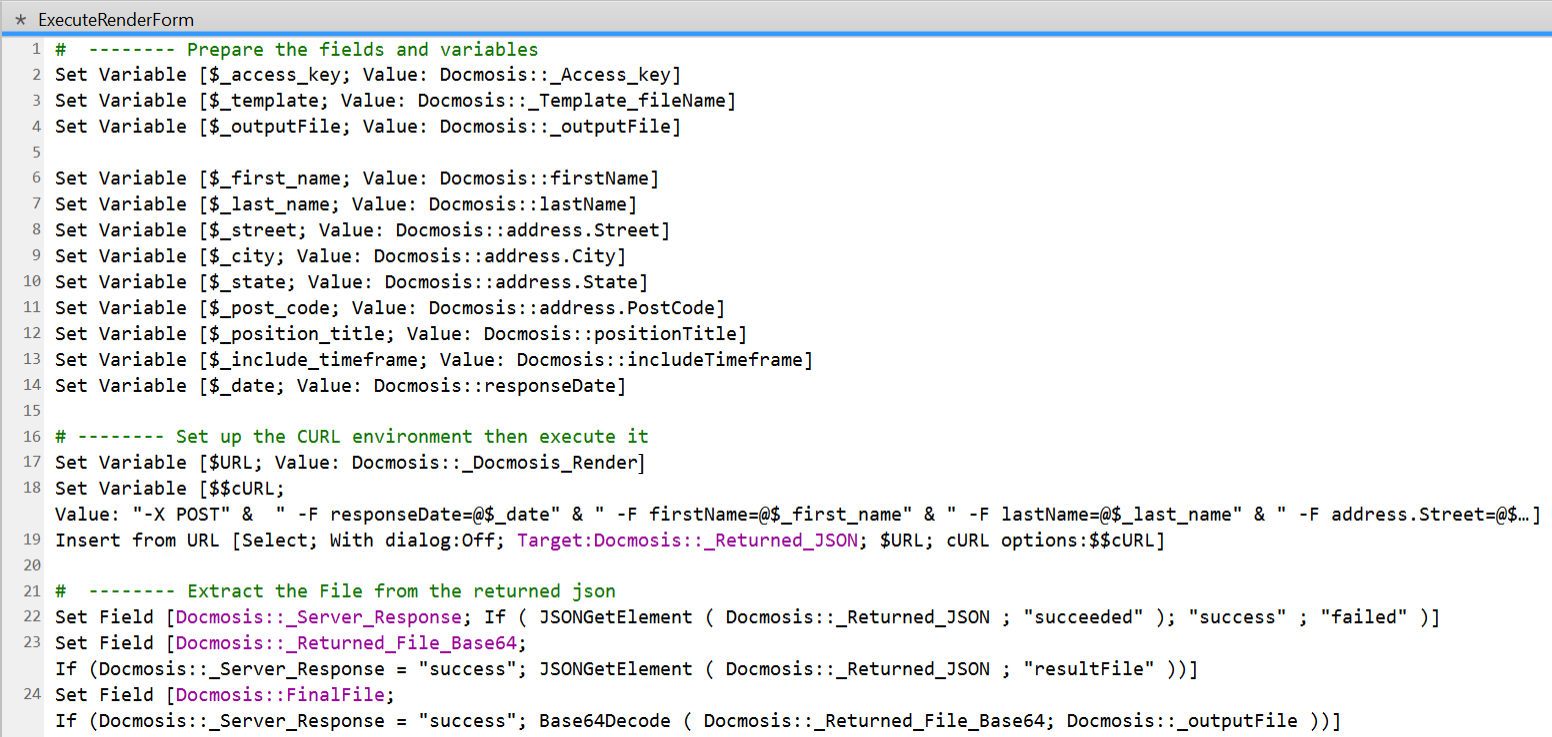
The full set variable script is:
"-X POST" &
" -F responseDate=@$_date" &
" -F firstName=@$_first_name" &
" -F lastName=@$_last_name" &
" -F address.Street=@$_street" &
" -F address.City=@$_city" &
" -F address.State=@$_state" &
" -F address.PostCode=@$_post_code" &
" -F positionTitle=@$_position_title" &
" -F includeTimeframe=@$_include_timeframe" &
" -F stylesInText=yes" &
" -F templateName=@$_template" &
" -F storeTo:stream" &
" -F streamResultInResponse=true" &
" -F outputName=@$_outputFile" &
" -F accessKey=@$_access_key " &
$URL
4.D) Back in our Script we now add a line to execute the Curl string we built in the previous step. Add an “Insert from url” function and set “With Dialog” to off. Specify the “Target” to be the field which will store the returned Json, set the “url” to the $URL variable and set the “cURL options” to the $$cURL variable we set up previously.

Once the script is executed the resulting document will be stored in the _Returned_JSON field in Base64 format.
4.E) Next we need to extract the file from the response. Firstly we will examine the succeeded field in the response to see if the render was successful:

We use the JSONGetElement function to get the value of the field succeeded from the json We make use of an If Then Else statement to set the field _Server_Response to either success or failed depending on whether succeeded is true or false.
Next, we set the field _Returned_File_Base64 with the value of the json field resultFile. We use an If Then statement to ensure we only do this if the Render succeeded.

Lastly we convert the Base64 document into a File and set our Container Database Field FinalFile with the result. As above, we use an If Then statement to ensure we only do this if the Render succeeded.

The final script should look something like this:
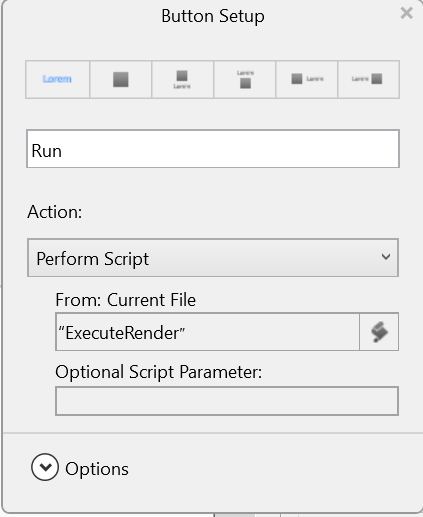
4.F) The last step is to link a button on your form to your script. Add a button to your form, Type in a label and set the Action to “Perform Script”. Select the script you created in the previous step.
That’s it - you're Finished!
Now if you fill in your form and click the Run button - you should receive a completed PDF.
If you followed our guide and need help please contact support.
Key Resources
- Downlaod the FileMaker project file
- Start a Docmosis Cloud trial here.
- Download the sample letter template used in this example.